Let’s look at some essential tools for handmade knitwear, because two sweaters can use the same yarn, the same pattern and the same number of hours, and still sell for different prices. The difference is usually in the finish: whether the edges lie flat, the seams disappear, the ends are hidden and the sizing is what the listing says. A buyer picking up a piece may not name any of this, but they notice it in seconds.
This guide covers the essential tools for handmade knitwear that affect that finish. Each one is matched to a flaw a buyer can see or feel, and to how fixing it supports a higher price. If you are still working out what to make and sell, Knitting Side Hustle Ideas is a good companion to this piece.
This post contains affiliate links, which means that the owner of this website will get commissions on qualifying purchases, at no extra cost to the buyer.
Why buyers pay more for a clean finish, not just nice yarn
Yarn is the part of a piece people can describe: soft, chunky, a lovely colour. Finish is the part they judge without describing it. A curling hem, a puckered seam or a loose tail poking through the inside tells them the piece was made at home and not checked afterwards.
Shop-bought knitwear has been pressed, trimmed and sized to a standard before it reaches the rack. Buyers compare your work to that, whether they mean to or not. When your piece matches it on finish and has the added value of being handmade, you have a reason to charge more than a market-stall price.
A clean finish also reduces returns and complaints. A sweater that fits the stated size and keeps its shape after the first wash is less likely to come back, and a buyer who is happy with it is more likely to order again.
Blocking tools: mats, T-pins, blocking wires and a spray bottle
Blocking is shaping finished knitting while it is damp so the stitches settle and the piece dries at the right size. It fixes curling edges, uneven stitches and lace that looks like a crumpled web. It is also the step most beginners skip, so it is often the quickest visible upgrade.
You need only four things:
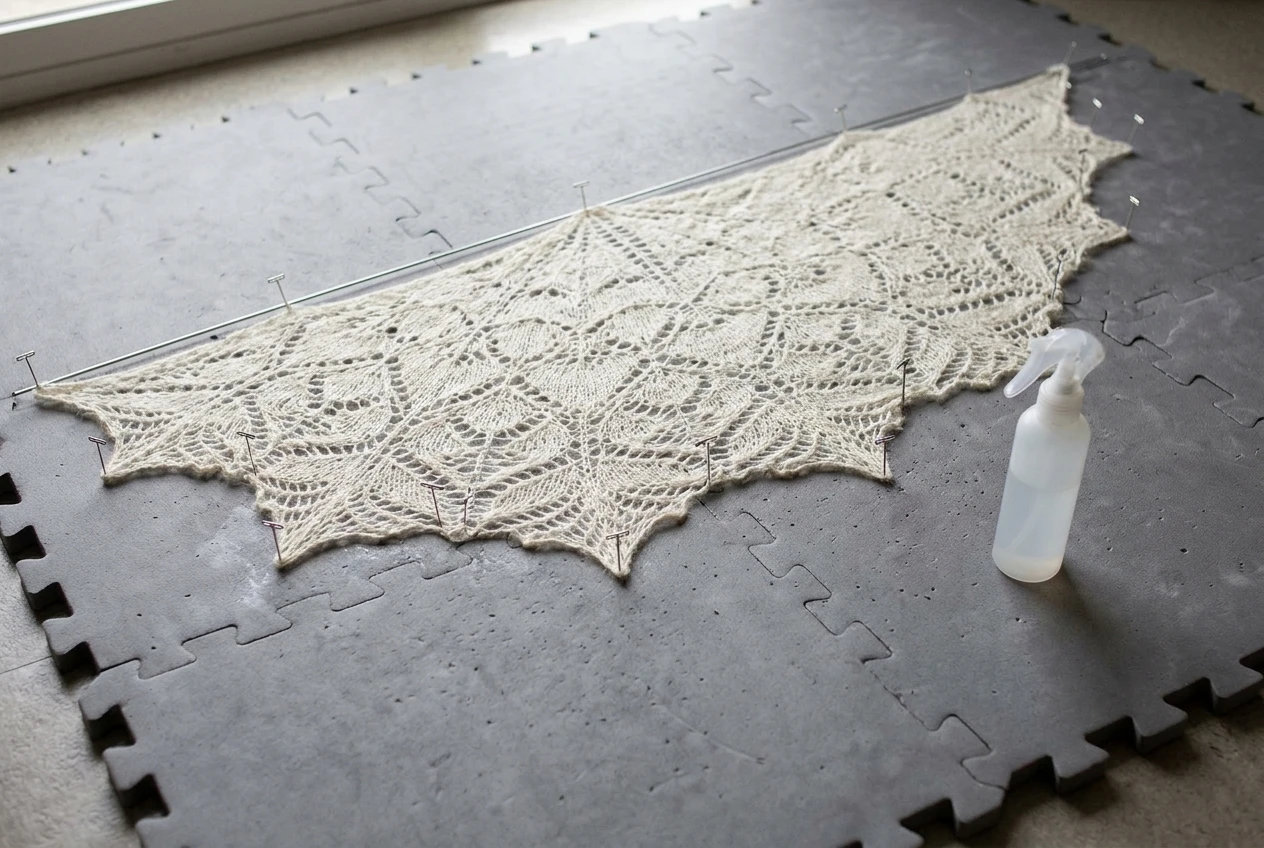
- Interlocking foam blocking mats. They give you a firm surface to pin into and can be joined to fit a large shawl or a sweater laid flat. Many have a printed grid, which helps you keep straight edges and check measurements as you pin.
- Rustproof T-pins. Stainless steel or coated pins will not leave rust marks on pale yarn. Ordinary sewing pins can stain, which ruins the piece you just finished.
- Blocking wires. Threaded along the edge of a shawl or scarf, a wire lets you pull a long edge perfectly straight with only a few pins. Without wires you pin every few stitches and the edge scallops between pins.
- A spray bottle. For lighter work, or fibres that do not need a full soak, misting the piece with water until it is damp is enough to relax the stitches before you pin.
Check the fibre before you choose a method. Wool and many natural fibres respond well to wet blocking, but steam can permanently flatten acrylic, so test on a swatch first. Blocking is also where you can bring a piece to the exact size you want, which leads to the next set of tools.
Measuring and sizing tools that keep every piece consistent
Buyers who order a medium expect the same medium each time. If your first hat fits and your fifth is a centimetre too tight, the pattern was not the problem. Your tension drifted, and nothing in your kit caught it.
A few measuring tools remove that guesswork:
- A flexible tape measure. Use it on the blocked piece, not the unblocked one, since knitting can change size once it is damp and pinned.
- A knitting gauge ruler with needle-size holes. It measures stitches and rows per 10 cm on a swatch and confirms the needle size when the label on an old needle has worn off.
- A kitchen scale. Weighing your yarn before and after a project shows how much a piece used. That helps you price the materials accurately and repeat a piece with the same amount of yarn.
- A notebook or sizing sheet. Record the finished measurements of each size you offer: chest, length, sleeve, head circumference. Knit and block to those numbers every time.
A swatch is worth knitting even for small items, because it tells you whether the fabric will hit your target size before you commit a whole skein. Consistent sizing is something a buyer can rely on, and reliability is part of what they pay for.
Tapestry needles, crochet hooks and seaming tools for invisible joins
Seams and loose ends are where handmade work most often looks homemade in the wrong way. A bulky, uneven seam across a shoulder is felt when the garment is worn, and a tail that works its way out after one wash will be noticed by the buyer.
Tapestry needles are the main tool here. Keep several sizes, because a thick needle that stretches fine yarn leaves visible holes, and a thin needle is hard to use with chunky yarn. Bent-tip needles are easier for picking up stitches on the edge and for weaving ends through the back of the fabric. Weave each tail along a few centimetres of stitches in one direction, then back in the other, so it stays put.
A small crochet hook does several jobs. It rescues dropped stitches, tidies a stitch that came out too loose, and pulls tails through tight spots. Use one close in size to the yarn you are working with.
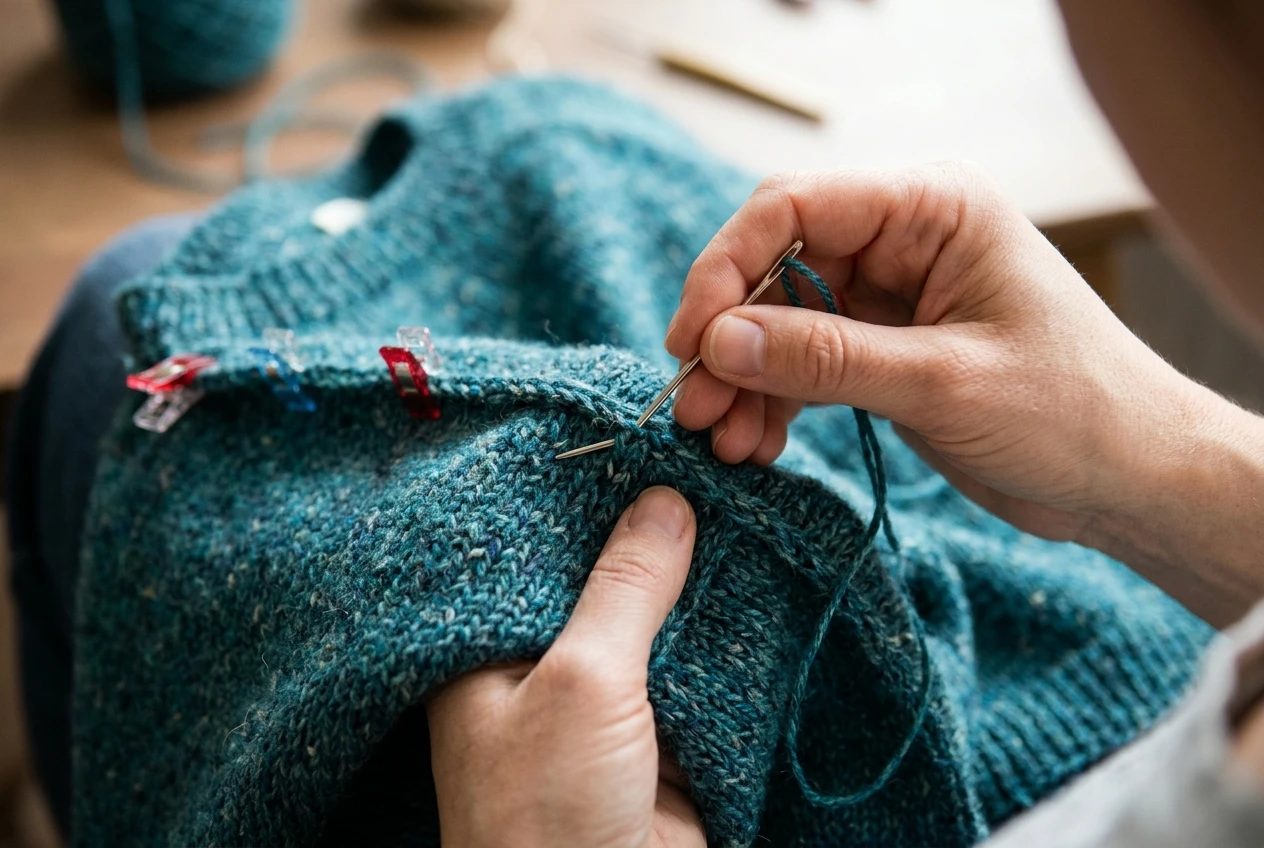
For seaming, the technique matters as much as the tool. Mattress stitch, worked from the right side with a tapestry needle, joins two edges so the seam is almost invisible and lies flat. Straight pins or clips hold the two edges in line while you sew, and they help you match rows evenly on both sides. If you want to build your technique before selling, Knitting Techniques For Beginners covers some of the groundwork.
Stitch markers, row counters and lifelines for even, error-free work
Some finishing problems begin while you are still knitting. A pattern repeat that slips by one stitch, a sleeve that is two rows longer than its partner, or a mistake you find twenty rows later all show up in the final piece. They are much cheaper to prevent than to fix.
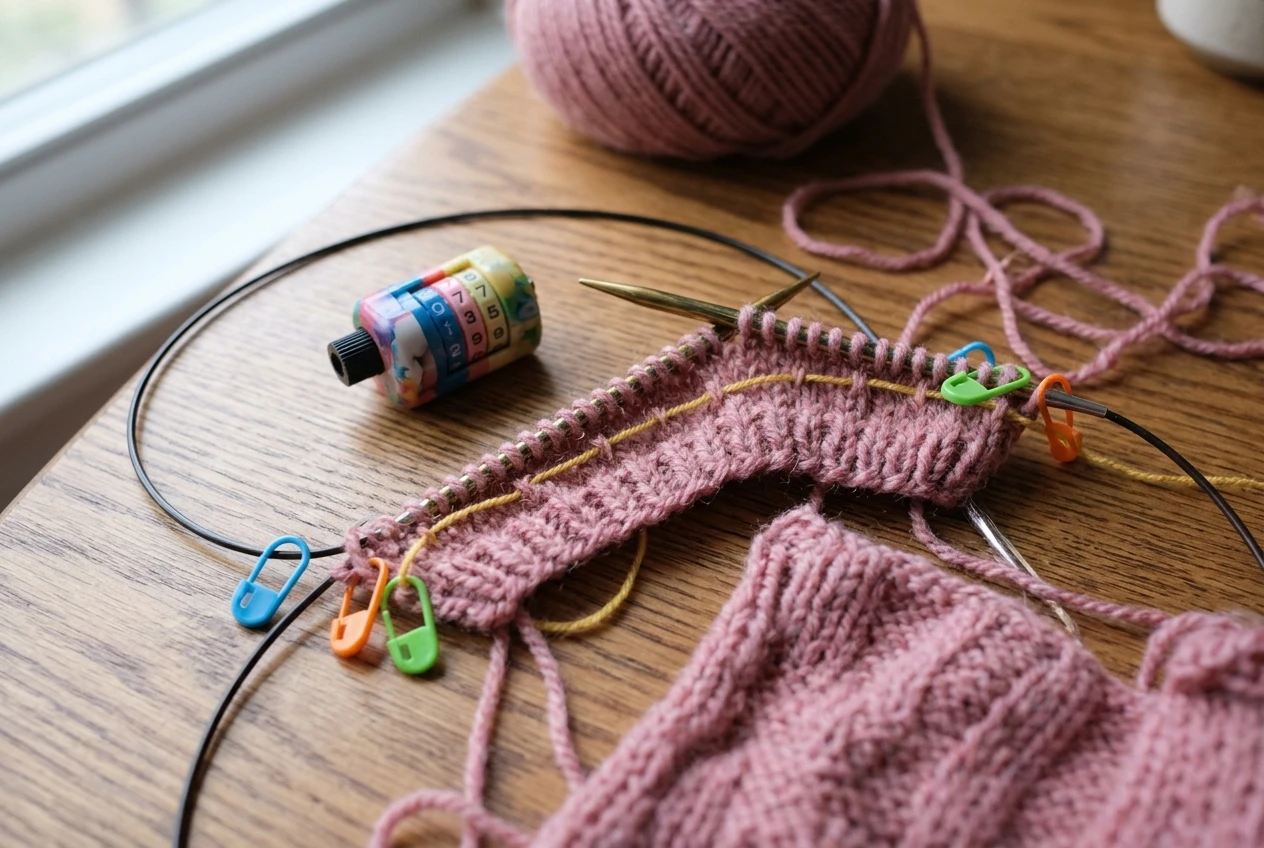
- Stitch markers separate pattern repeats, mark the start of a round and flag increase or decrease points. Use the locking kind when you need to move a marker mid-row or mark a specific stitch for later.
- Row counters, whether a small click counter or a tracking app, keep matching pieces the same length. This matters most for pairs: two sleeves, two socks, two mittens.
- Lifelines are a length of smooth, contrasting yarn or thread run through a row of stitches on the needle. If you make a mistake further up, you rip back to the lifeline and the stitches are already caught and ready to pick up. They are most useful before a tricky lace or cable section.
Sellers get the most out of these because they cannot afford to unravel a nearly finished piece, and a second-grade piece with a known flaw sells for less. Catching an error at row ten, not row sixty, protects both your time and your margin.
Scissors, a lint remover and a sweater shaver for the final polish
The last pass before packing is the one most people rush. It is also when small flaws get removed for good.
Small, sharp scissors let you trim tails close to the fabric without nipping a stitch. Snips with a fine point reach into tight corners. Cut only after you have woven the end in properly, and leave a short tail so it cannot work loose.
A lint roller or lint remover clears pet hair, stray fibres and the fuzz that collects while a piece sits in a project bag. Do this just before photographing and packing, since fuzz is very visible in close-up photos.
A sweater shaver or fabric comb removes pills from the surface. Use it gently on a flat surface and test on a swatch or an inside hem first, because too much pressure on a loosely spun yarn can thin the fabric. Some yarns pill more than others, and a piece that has been shaved smooth looks newer and more expensive than one that has not.
Presentation tools: labels, tags and packaging that finish the look
A well-finished piece can lose its effect if it goes out in a plastic bag with no information. The buyer’s impression includes how it arrives.
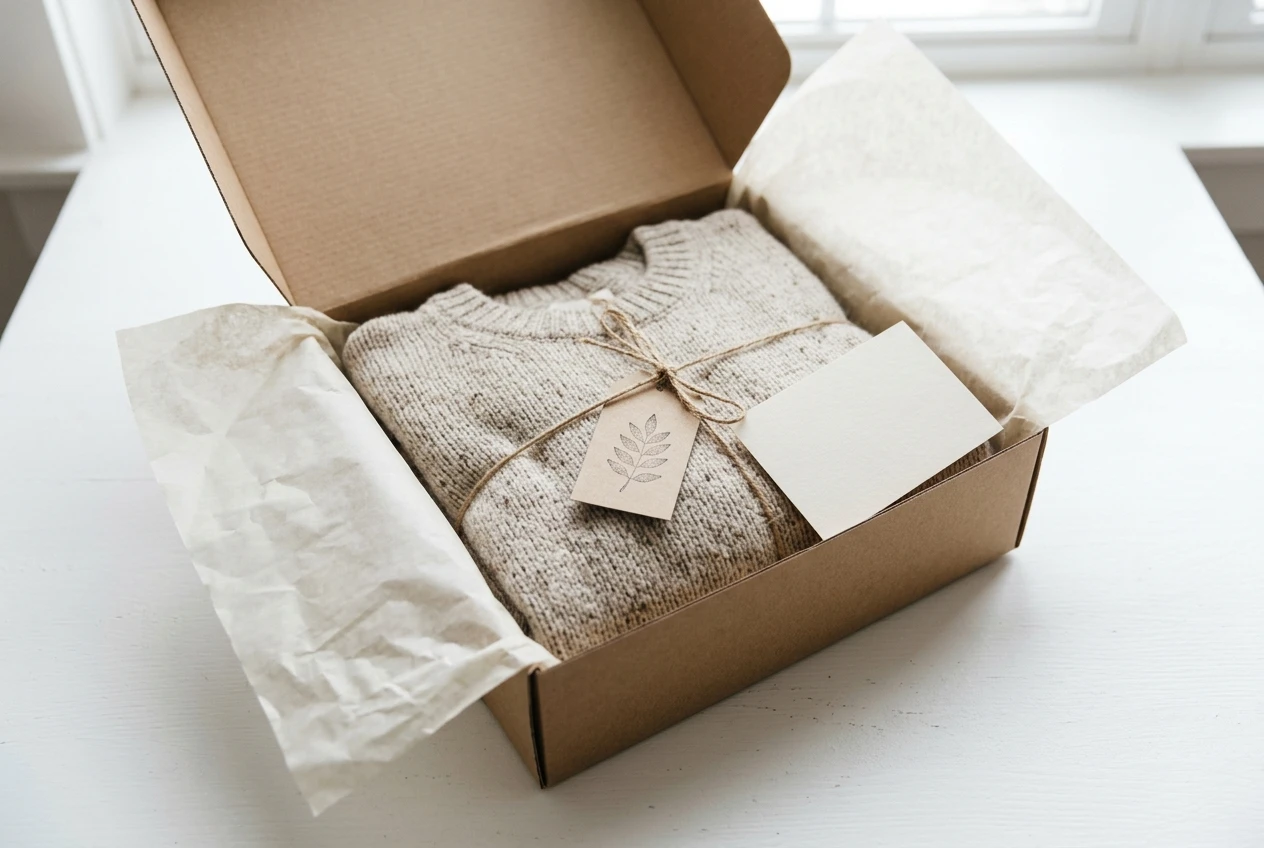
- Sewn-in or attached labels with your shop name make the piece look branded. They also give you a place to put care instructions and fibre content. Check the labelling rules where you sell, since requirements differ from place to place.
- Hang tags are a good spot for size, fibre and a short care note. A buyer who knows how to wash the piece is less likely to shrink it.
- Tissue paper, a clean box or a tidy paper wrap protect the piece in transit and make opening it feel like a gift. Gift Wrapping Ideas has some ways to dress up a parcel without much cost.
- A thank-you card with a line about care and a way to reach you encourages repeat orders and reviews.
None of these change the knitting, but they change how the knitting is received, and that is part of what supports a higher price.
Which tool to buy first if your budget is small
If you can only buy one thing now, buy blocking supplies: a set of foam mats and a box of rustproof pins. Blocking changes the look of nearly everything you make, and its effect is immediate. A mat and pins can be used for every piece, from dishcloths to shawls. Spray bottles are cheap, and a clean one you already own will do.
Second, a set of tapestry needles in a few sizes, which cost very little and improve seams and woven ends. Third, a tape measure and a sizing notebook, so every piece matches the size in its listing. Add stitch markers and a lifeline habit as your patterns get more complex, and buy a sweater shaver and presentation extras as orders start coming in.
Blocking needs a flat, undisturbed space where a piece can dry for a day. If yours is cramped, Setting Up Your Knitting Space has ideas for making room.
Pick one finishing tool from this list to add to your kit this week, and read my guide on how to photograph handmade items so your polished pieces look as good online as they do in your hands.