One of my favorite beginner embroidery stitches is cross stitch. I remember starting with this stitch, and although I haven’t had the time to do embroidery for a few years, I occasionally do a small cross-stitch card or picture to give someone as a present, as it is quick and easy.
Embroidery is something that I learned to do when I was a teenager. My gran taught me and I remember sitting with her for hours making tray cloths.
Doing embroidery isn’t as popular anymore as it was then, unfortunately. I reckon it is because you need a lot of time and patience to do embroidery well.
Here are some of the beginner embroidery stitches that she started me off with. I have included one video and then illustrations of the others.
This article may contain affiliate links, which means that a small commission will be paid to the owner of this website for qualifying purchases.
Cross Stitch – The Easiest of the Beginner Embroidery Stitches To Start With
Satin Stitch
One of the most useful and common of the solid stitches.
Satin stitch is used for filling in leaves, flower petals, etc.
Be careful to keep the stitches even and don’t pull them too tight, or the work will pucker.
Satin stitch is best worked with the fabric held in an embroidery frame like this one
Straight Stitch
The straight stitch is one of the simplest stitches and is used for flower centers, petals, leaves, or as decoration.
Bring the needle up through the fabric and insert it again a short distance away. Don’t make the stitches too long or loose.
These stitches can vary in length to form a simple pattern.
Chain Stitch
The chain stitch is one of the beginner embroidery stitches that is the most useful to know how to do.
You can use it for stems, outlines, or even as a filling.
Bring the thread out at the top and hold with the left thumb. Insert the needle where it came out and bring it out again lower down. Draw the needle through, keeping the thread below.
Now that we have looked at some of the beginner embroidery stitches, let’s now look at some more basic embroidery stitches, that in some cases are a little more advanced for you to experiment with.
Some More Advanced Hand Embroidery Stitches
Here are some explanations and diagrams for you on more advanced hand embroidery stitches you can try out.
The Roumanian Stitch
Bring the needle out at the left, take over, and pick up a stitch at the right side, keeping the thread below the needle and to the left.
Take a stitch at the left side, and thread over the needle to the right.

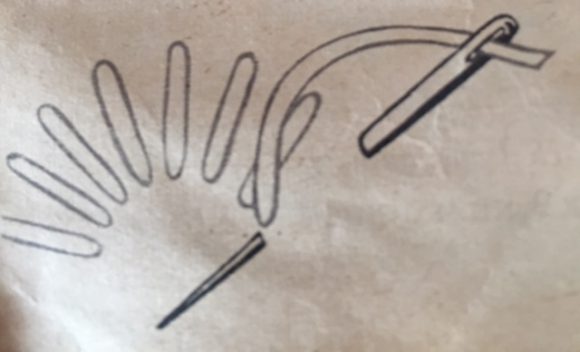
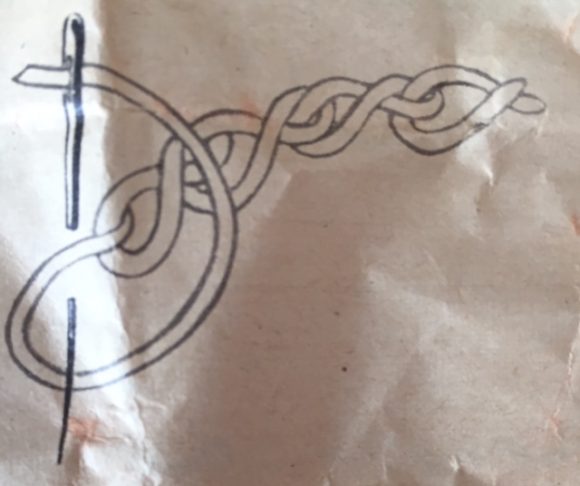
The Twisted Chain
Start the twisted chain as an ordinary chain stitch which you can see here.
Now instead of inserting the needle where it came out, insert it close to the last loop. Take a slanting stitch coming out on the line of design and draw the thread through.
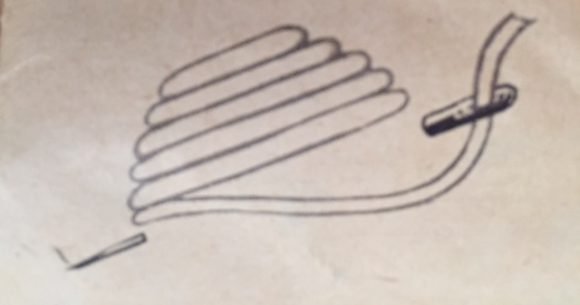
Overcast Stitch
The overcast stitch is used for outlines or even narrow stems.
Draw through padding thread and working thread.
Lay the padding thread on the line of the design and work satin stitches over it.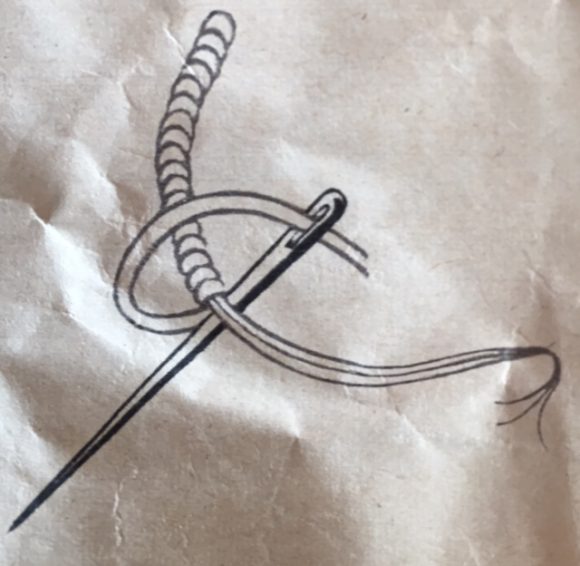
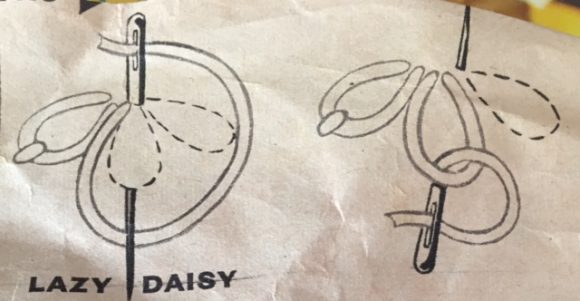
Lazy Daisy
Bring the needle out at the base of the petal or leaf and hold the thread down with your thumb.
Insert the needle again at the base and pull out at the tip, keeping the thread below the needle.
Fasten the loop with a small stitch, then bring the needle out at the base of the next petal.
Double lazy daisy stitch has a second stitch worked inside of the first.
This stitch can be used for flowers or leaves.
Long and Short Stitch
The long and short stitch is normally used for shading and for shapes that are too large or irregular for satin stitch.
Begin at the outer edge with a row of stitches alternately long and short, and follow the outline closely.
Other rows follow the first.
Fit the stitches well into each other and do not make them too uniform.
This is one of the most useful hand embroidery stitches to know how to do.

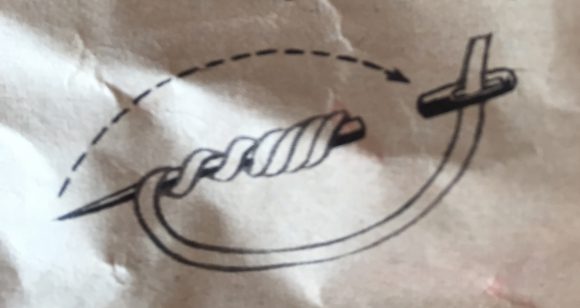
Bullion Knot
This stitch is used to make things like eyes on animals, centers of flowers, or even hooves.
Pick up a back stitch the required length of the know and twist the thread around the needle to this length.
Hold the twists down with the thumb and draw the needle through.
Turn it back and insert it a the point where it was first inserted.
Use a small-eyed needle, or it will not come through the twists easily.
Scalloped Edging
This is another simple but effective finish for the edges of mats, tablecloths, etc, and is a scalloped edge.
This can be drawn quite simply by tracing around the edge of a coin.
More elaborate scallops can be obtained by using coins of different sizes.
The scalloped outline is filled in with a button-hole stitch (see below), working the stitches closely together. The knotted edge of the stitch must be towards the outer edge of the mat.
Take care to keep the scallops even or the effect won’t look the same.
When the buttonhole stitching is finished, cut away the fabric on the outside with very sharp scissors, close to the stitching.
If you want the edging to have a raised appearance, pad the scallops with mall running stitches before working the buttonhole stitch.

Hem Stitch
Using hem stitches as hand embroidery stitches makes very attractive finishings to tablecloths.
Mark the desired depth of the hem and draw out several threads along this line.
Miter the corners, turn in the hem to the line of drawn threads and tack.
Work hemstitching along both edges of drawn threads. The outer line catches down the hem.
There are many different types and forms of the hem stitch and this is just one of them.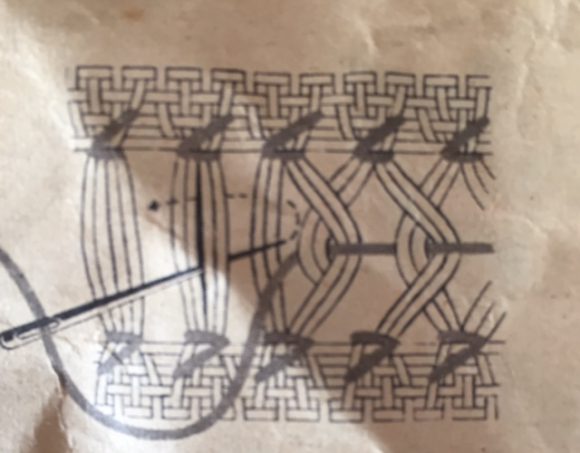
French Knot
Bring the needle out in the required place.
Holding the thread taut with the left thumb, wind the needlepoint twice around the thread.
Still, with the thread taut, turn the needle back and insert at the point of entry. Draw through to the back and secure, or pass to the next point.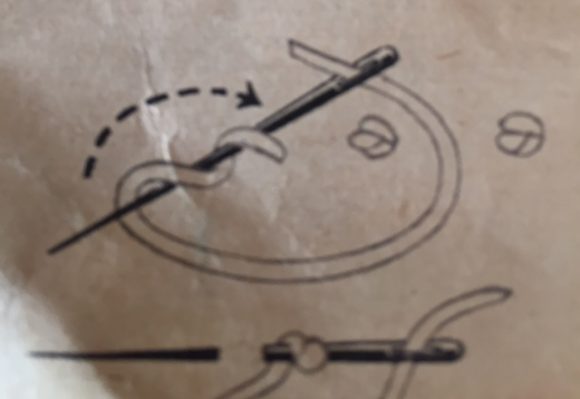
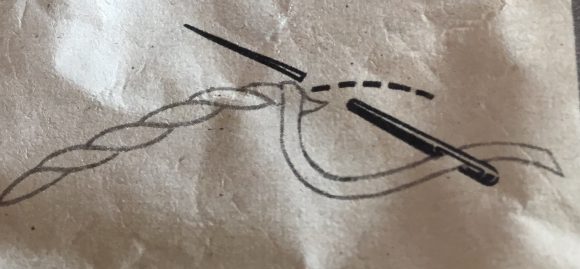
Button-Hole Stitch
The diagram to the right shows exactly what to do.
You can use this stitch on the wings of butterflies, flowers leaves, and many other different things.
When the button-hole stitch is used as an edging, the stitch lengths may be varied.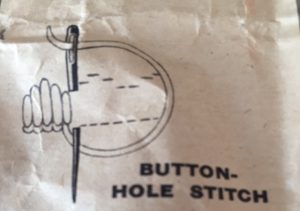
Feather Stitch
Keeping the thread below the needle, pick up a piece of fabric first to the left, then to the right of the centerline.
This stitch is used for things like daisy petals.
Vandyke Stitch
This stitch is often used as a border, but it can also be a filling stitch.
Bring the thread out at left.
In the center and about half in.
Farther up, pick up a small piece of fabric.
Take the thread through to the back, level with the starting point.
Work all the stitches in this way, passing the needle behind the center of the previous stitch.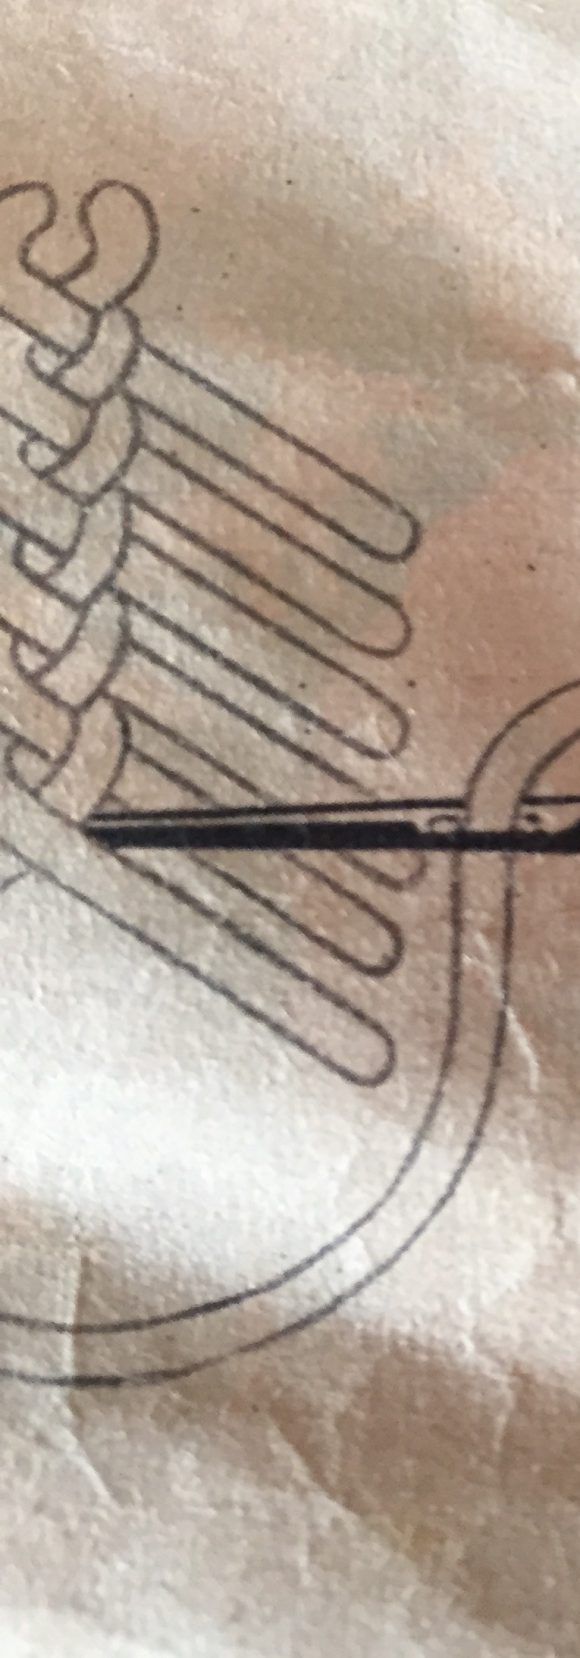
Double Back Stitch
The needle picks up a small piece of material first on one side and then on the other, making a plait.
The reverse side should show a neat double line of back stitches.
This stitch can be used as a filler stitch, shadow stitch, or a border. It is normally worked on fine fabrics with a strongly colored thread.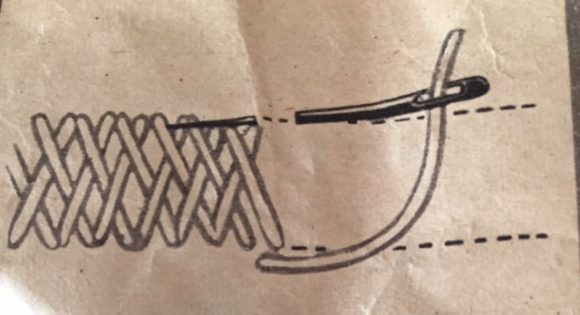
Stem Stitch
This is one of those beginner embroidery stitches and is very popular for use on stems and tendrils or as an outline.
When working, keep the thread on the same side of the needle, either right or left, making regular slightly slanting stitches along the line of the design. For fine stems work exactly on the traced line.
Wheatear Stitch
Single wheatear, inlines or as isolated stitches, is worked as shown.
Bring out the needle at A, insert at B, keep the thread below the needle, and bring out between A and B and a little lower. Now complete as a chain stitch.
Use instead of chain stitch or lazy daisy stitch for a more decorative effect.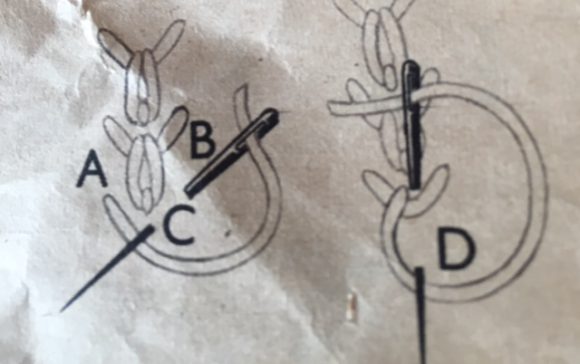
Swiss Darning
Swiss darning or duplicate stitch is a great way to add small details to your knitting.
It covers your knitting stitch with an embroidery stitch the same shape as the knitted stitches so it looks like it was knitted into the purl side of the garment.
Work from the bottom of your knitting. Bring the needle out at the base of the stitch. Take the needle behind the top of the right side of the ‘V’ and out again at the left side of the ‘V’. Take the needle back through the base of the stitch and bring it up at the base of the next stitch you would like to sew.
If you would like to find out more about hand embroidery stitches, and there are a lot more of them, you can purchase this book by clicking on either the link.
The Embroidery Stitch Bible: Over 200 Stitches Photographed with Easy-to-Follow Charts (Artist/Craft Bible Series)
The photographed samples are shown in full size.
Each stitch is fully described and illustrated with numbered figures and accompanied by a list of its main uses, with helpful notes on the working method. This book has beginner embroidery stitches through to more advanced hand embroidery stitches.
Many stitches have alternative names; these are also listed and included in the index as a useful reference aid.
Please feel free to comment below if you have a favorite hand embroidery stitch you would like to mention.
If you would prefer a faster method of getting those embroidery designs made, why not look at an Embroidery Machine?
Happy Embroidering!
I see you publish great stuff and excellent helpful information. I need to share my experience. I have seen a website that gives me satisfactory
machine embroidery at a quality low-cost price for embroidery.