Here are some basic knitting stitches you can use in your patterns:
You can use these basic knitting stitches with any knitting pattern, or even make squares with a variety of basic knitting stitches when knitting a blanket.
If you knit squares using these basic knitting stitches it is an excellent way to practice the various patterns and see which types of basic knitting stitches you enjoy doing the most.
For knitting abbreviations, click here.
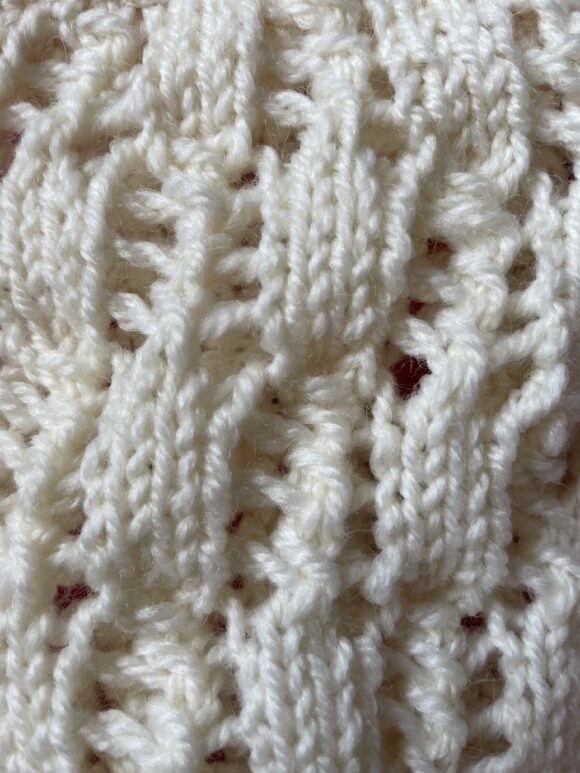
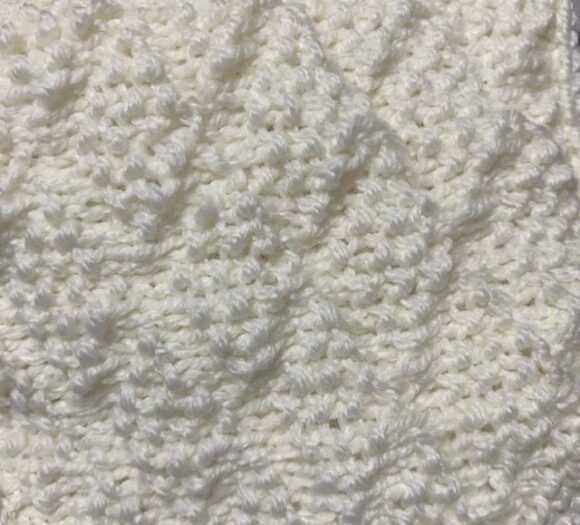
Alternating Lace Stitch
This effective design uses a simple combination of increases and decreases to form the eyelets.Cast on a multiple of 6 stitches plus 3 for this pattern to work.
Row 1 (rs): K3, *yfd, sl 1, k2 tog, psso, yfd, k3, rep from * to end.
Row 2: P to end.
Rows 3 to 8: Rep rows 1 and 2 three times.
Row 9: K1, k2tog, yfd, k3, *yfd, sl1, k2tog, psso yfd, k3, rep from * to last 3 sts, yfd, skpo, k1.
Row 10: P to end.
Rows 11 to 16: Rep rows 9 and 10 three times.
These 16 rows form the pattern for this basic knitting stitch.
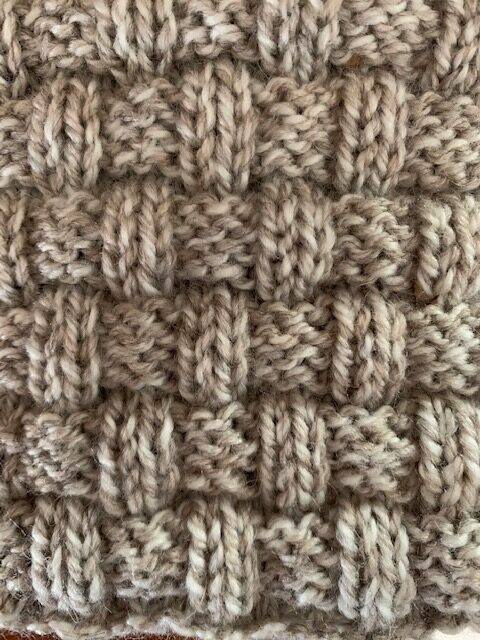
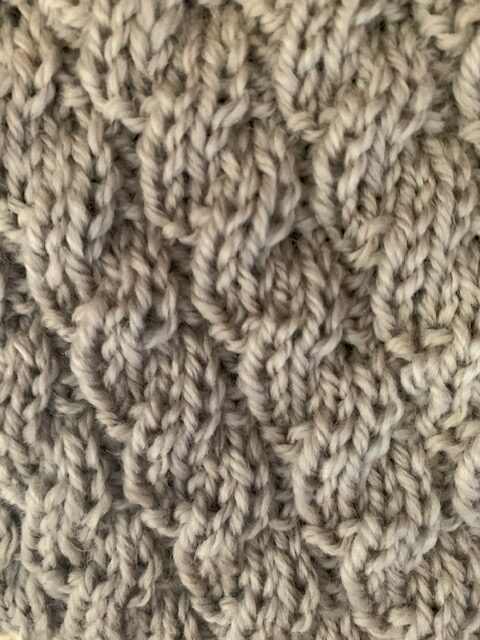
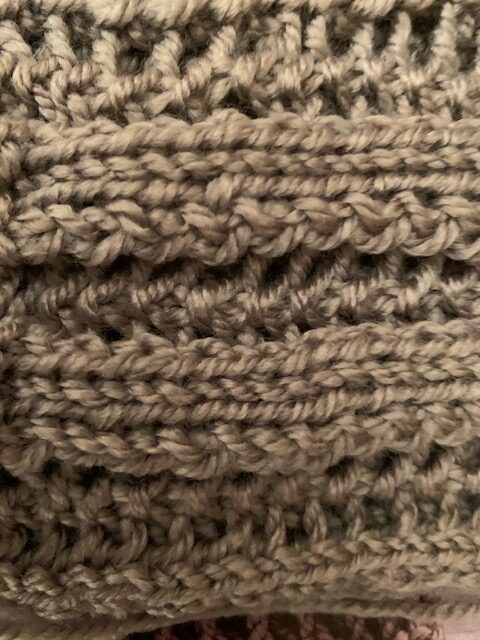
Basket Weave Stitch
This knitting stitch is worked in a combination of knit and purl stitches to form the interesting basket weave effect you see below.
Cast on a multiple of 6 stitches plus two and work the pattern as follows:
 Row 1: K to end.
Row 2: P to end.
Row 3: K2, *p4, k2, rep from * to end.
Row 4: P2, *k4, p2, rep from * to end.
Row 5: Rep row 3.
Row 6: Rep row 4.
Row 7: K to end.
Row 8: P to end.
Row 9: P3, k2, *p4, k2, rep from * to last 3 sts, p3.
Row 10: K3, p2, *k4, p2, rep from * to last 3 sts, k3.
Row 11: Rep row 9.
Row 12: Rep row 10.
These 12 rows form the pattern.
Bed Jacket Stitch
 This one is easy and fun to do and makes a very soft fabric.
Row 1: (rs): K to end, wrapping yarn twice around the needle on each st.
Row 2: P to end, dropping the extra loops from the previous row.
These two rows form the pattern.
Bell Pattern
For this example, I use 4mm needles and 39 sts.
Row 1(rs): p8, k3, *p2, k3, rep from * to last 8 sts, p8.
Row 2: k8, p3, *k2, p3, rep from * to last 8 sts, k8.
Rows 3 and 4: As rows 1 and 2.
Row 5: p8, with yarn at front sl 1, k2 tog, psso, yrn, *p2, with yarn at front sl 1, k2tog, psso, yrn, rep from * to last 8 sts, p8.
Row 6: As per row 2.
These 6 rows form the pattern.
Block Pattern
For this example, I am using 3.5mm needles and 41 stitches
Row 1: k6, *p1, k6, rep from * to end
Row 2: P6, *k1, p6, rep from * to end
Row 3 to Row 6: Work rows 1 and 2 twice
Row 7: As per row 1
Row 8: k to end
These 8 rows form the pattern.
Bobbles To Sew Onto Your Knitting
For this example, I am using 4 mm needles and 6 sts
Work 8 rows g st (k every row)
Cut off yarn leaving a 12cm end
Thread the end through the sts, then using this end to work small running stitches around the outer edge of the knitting
Pull up to form a bobble and secure the end
Do not cut the yarn as you use the yarn ends to sew bobble to the square
Bramble Stitch
With this Bramble Stitch, you work in multiples of 4 and add two stitches. For example, you could have 20 + 2 stitches or 24 + 2 stitches, etc.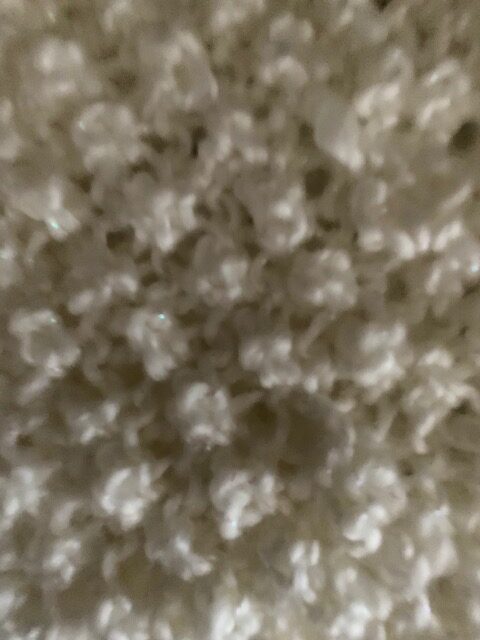
Row 1: (rs) p to end.
Row 2: k1. *work k1, p1, and k1 all into next st. p3 tog. rep from * to last st. k1. (On the k1, p1, k1 you are actually increasing by three stitches without pushing the stitch off of the needle).
Row 3: p to end.
Row 4: k1. *p3tog, work k1, p1, and k1 all into next st. rep from * to last st. k1.
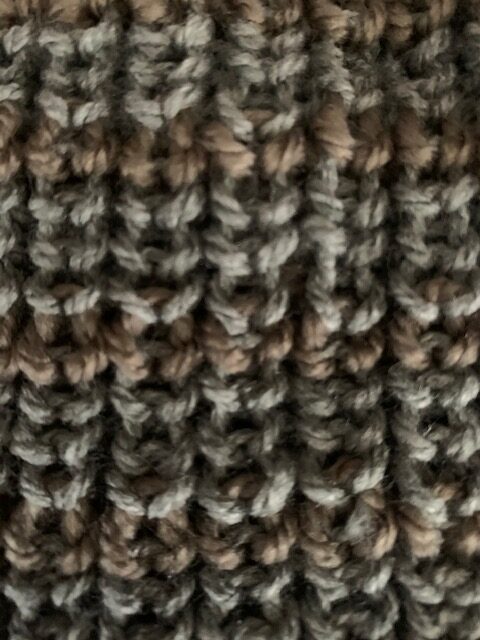
Broken Ribbing
This pattern looks like ribbing that goes thick and thin, forming a bubble-type look, especially if you use fluffy wool.
Cast on a multiple of 6 stitches.
Row 1 (rs): K1, p2, *k4, p2, rep from * to last st. k1.
Row 2: P1, k2, *p4, k2, rep from * to last st, p1.
Row 3 and 4: Rep rows 1 and 2.
Row 5: P4, *k2, p4, rep from * to end.
Row 6: K4, *p2, k4, rep from * to end.
Rows 7 and 8: Rep rows 5 and 6.
These 8 rows form the pattern.
Butterfly Stitch
This is one of those pretty basic knitting stitches and you are going to need a multiple of 10 stitches plus 7.
Row 1 (rs): K to end.
Row 2: P to end.
Row 3: K6, *k2tog, yfd, k1, yfd, skpo, k5. Rep from * to last st. K1.
Row 4: K1, p7, sl1 p-wise with yarn at front, p7, k1.
Row 5 and 6: Rep rows 3 and 4.
Row 7: K to end.
Row 8: P to end.
Row 9: K1, k2tog, yfd, k1, yfd, skpo, *k5, k2 tog, yfd, k1, yfd, skpo. Rep from * to last st, k1.
Row 10: K1, p2, sl 1 p-wise with yarn at front. *P9, sl 1 p-wise with yarn at front. Rep from * to last 3 sts, p2, k1.
Row 11 and 12: Rep rows 9 and 10.
These 12 rows form the butterfly pattern.
Cable Pattern
For this example, I am using 3.5mm needles and 54 sts
Row 1 (rs): p4, *k6, p4, rep from * to end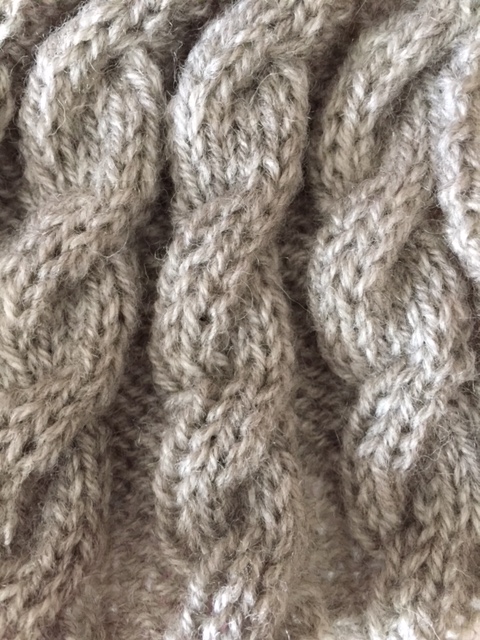
Row 2: k4, *p6, k4, rep from *to end
Rows 3 and 4: Rep rows 1 and 2
Row 5: p4, *C6B, p4, rep from * to end
Row 6: Rep row 2
Rows 7 and 8: Rep rows 1 and 2
These 8 rows form the pattern
Special Abbreviation:
C6B = cable 6 back worked thus: place next 3 sts on a cable needle and leave at back of work, k3, then k the sts from cable needle.
Cartridge Stitch
This is one of those basic knitting stitches that is super simple.
You can cast on any number of stitches and knit as follows:
Row 1 (rs): K to end.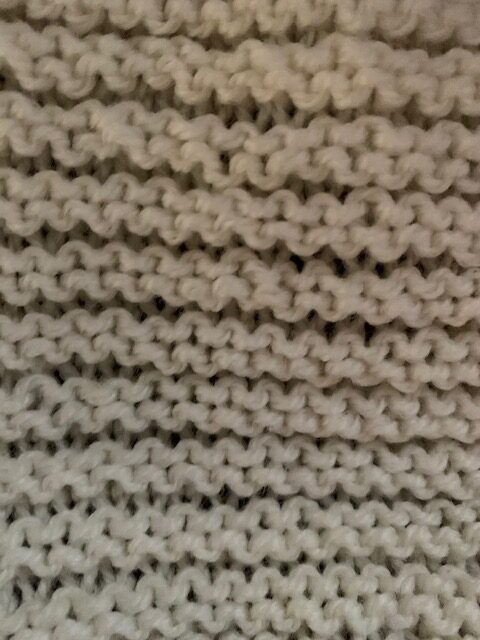
Row 2 and 3: P to end.
Row 4: K to end.
The above four rows form the pattern.
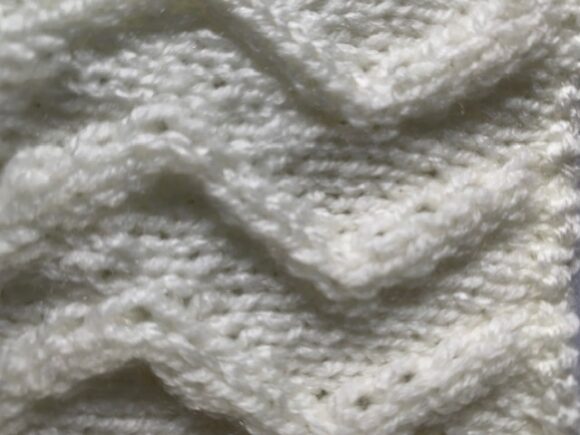
Chevron Moss Stitch
For this basic knitting stitch you will need to have a multiple of 8 stitches plus 1 to work with.
Row 1 (rs): P1, *k3, p1, rep from * to end.
Row 2: P1, *k1, p5, k1, p1, rep from * to end.
Row 3: K2, p1, *k3, p1, rep from * to last 2 sts, k2.
Row 4: P3, k1, p1, k1, *p5, k1, p1, k1, rep from * to last 3 sts, p3.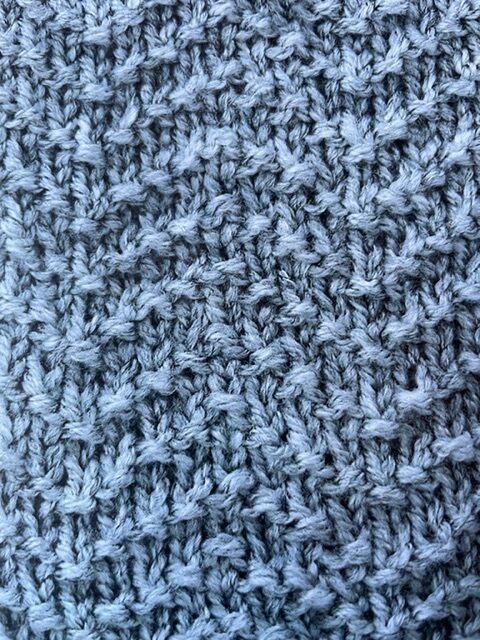
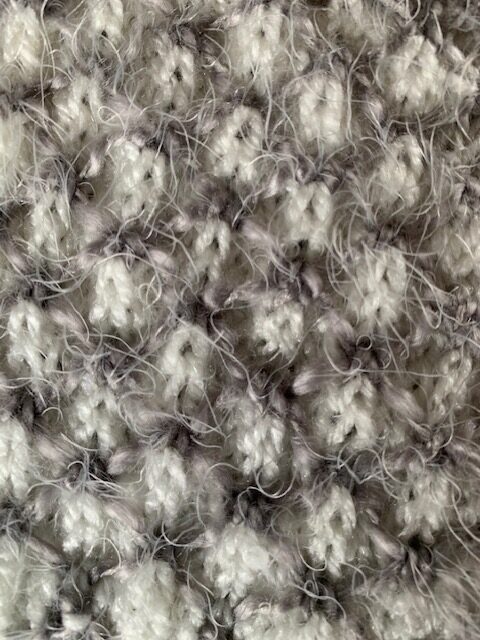
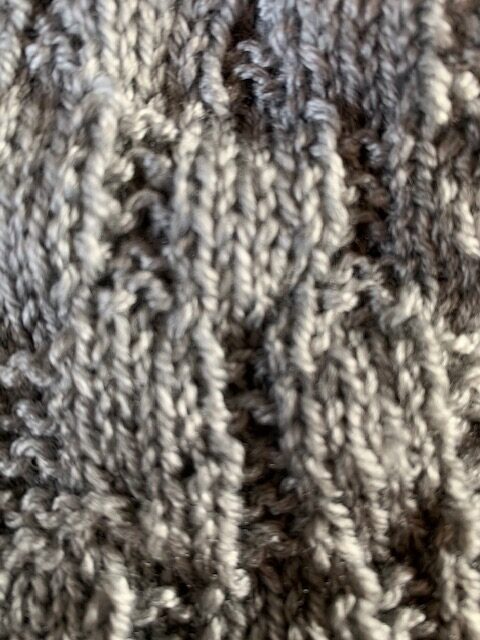
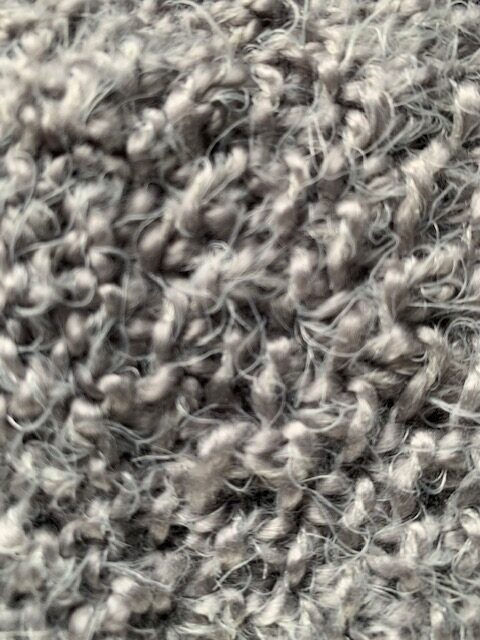
2-Colour Honeycomb Stitch
For this basic knitting stitch, you will need two colors. I used two different types of yarn here and used the thinner one for the background and the fluffy thick one for the surface texture.
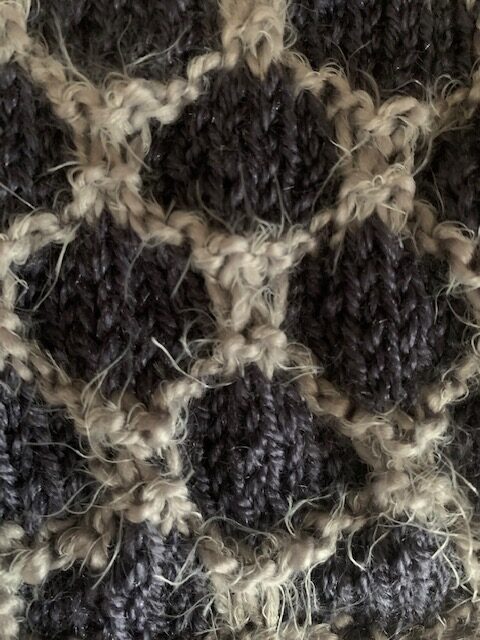
Using your surface color cast on the required number of stitches and knit two rows. For this example we will cast on 24 sts.
Row 1: With background color k3, sl 2 p-wise with yarn at back, *K6, sl 2 p-wise with yarn at back. rep from * once more. k 3.
Row 2: Still with background color p2, sl 2 p-wise with yarn at front. *p6, sl 2 p-wise with yarn at front. Rep from * once more, p3.
Rows 3 to 6: Rep rows 1 and 2 twice.
Rows 7 and 8: With surface color k to end.
Row 9: With background color, sl 1 p-wise with yarn at back, k6. *sl 1 p-wise with yarn at back, k6. Rep from * once more.
Row 10: With background color, sl 1 p-wise with yarn at front, P6. *sl 2 p-wise with yarn at front. P6. Rep from * once more sl 1 p -wise with yarn at front.
Rows 11 to 14: Rep rows 9 and 10 twice.
Rows 15 and 16: With surface color k to end.
These 16 rows form the pattern.
Crossed Rib Stitch
See the special abbreviations on this page.
I found this one quite tricky to learn and not very comfortable to knit, but like anything you get used to it. Make sure you are not knitting too tightly or you will battle with this one.
Cast on a multiple of 4 stitches plus 2 to make the crossed rib pattern.
Row 1 (rs): K2, *p2, k2, rep from * to end.
Row 2: P2, *k2, p2, rep from * to end.
Rows 3 to 6: Rep rows 1 and 2 twice.
Row 7: K1, *Tw2L, Tw2R, rep from * to last st, k1.
Row 8: P1, k1, p2, *k2, p2, rep from * to last 2 sts, k1, p1.
Row 9: K2, p1, Cr2L, *p2, Cr2L, rep from * to last 2 sts, p1, k1.
Row 10: P1, k1, p2, *k2, p2, rep from * to last 2 sts, k1, p1.
Row 11: K1, *Tw2R, Tw2L, rep from * to last st, k1.
Row 12: Rep row 2.
These 12 rows form the pattern.
Here is a video to help you to better under stand this knitting stitch.
Diagonal Stitch
Cast on a multiple of 6 stitches plus 4.
Row 1 (rs): K1, p2, *k4, p2. Rep from * to last st, k1.
Row 2: P1, k2, *p4, k2 rep from * to last st, p1.
Row 3 and 4: Rep rows 1 and 2.
Row 5: K3, *p2, k4, rep from * to last st, k1.
Row 6: P5, k2, *p4, k2, rep from * to last 3 sts, p3.
Row 7 and 8: Rep rows 5 and 6.
Row 9: K5, p2, *k4, p2, rep from * to last 3 sts, k3.
Row 10: P3, *k2, p4, rep from * to last st. p1.
Rows 11 and 12: Rep rows 9 and 10.
These 12 rows form the pattern that you see above.
Diagonal Stitch – 2nd Variation
Cast on a multiple of 6 stitches.

Row 1: *P3, k3, rep from * to end.
Row 2: Rep row 1.
Row 3: K1, p3, *k3, p3, rep from * to last 2 sts, k2.
Row 4: P2, K3, *p3, k3, rep from * to last st, p1.
Row 5: K2, p3, *k3, p3, rep from * to last st, k1.
Row 6: P1, k3, *P3, K3, rep from * to last 2 sts, p2.
Row 7: *k3, p3, rep from * to end.
Row 8: Rep row 7.
Row 9: P1, K3, *p3, k3, rep from * to last st, p2.
Row 10: K2, p3, *k3, p3, rep from * to last st, k1.
Row 11: P2, k3, *p3, k3, rep from * to last st, p1.
Row 12: K1, p3, *k3, p3, rep from * to last 2 sts, k2.
These 12 rows form the pattern.
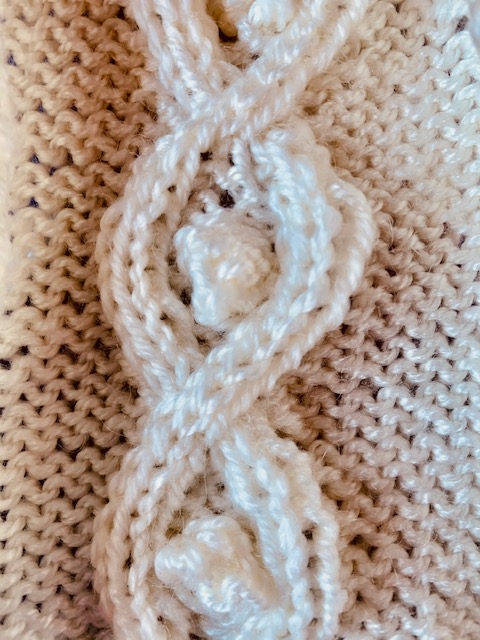
Diamond And Bobble Stitch
This is worked in reverse stocking stitch background with a pretty cable and bobble pattern that stands out from your work. You will need a cable needle for this one.
The actual pattern is worked over 9 stitches, so the minimum amount of stitches to cast on is 15 if you have three stitches on each end of your cable.
For this example, I cast on 27 stitches.
Row1 (rs): P10, Cr3R, p1, Cr3L, p10.
Row 2: K10, p2, k3, p2, k10.
Row 3: P9, Cr3R, p3, Cr3L, p9.
Row 4: K9, p2, k5, p2, k9.
Row 5: P9, k2, p2, MB, p2, K2, p9.
Row 6: Rep row 4.
Row 7: P9, Cr3L, p3, Cr3R, p9.
Row 8: Rep row 2.
Row 9: P10, Cr3L, p1, Cr3R, p10.
Row 10: k11, p2, k1,p2, k11
Row 11: P11 C5R, p11.
Row 12: Rep row 10.
These 12 rows form the pattern.
PS: MB from row 5 stands for Make Bobble. After doing the first part of the row, knit into the front, back, front, then back again of the next stitch and let the stitch drop from the left needle – you have made 4 stitches from1 stitch for the bobble.
Turn the knitting and purl these 4 stitches, turn and knit 4, turn and purl 4, turn. Slip the first stitch of bobble onto the right needle, knit 3 together, then pass the slipped stitch over to complete the bobble. Knit the rest of the row as per the instructions.
Other Special Abbreviations:
Cr3R = cross 3 right worked thus: sl 2st st onto cn and leave at back of work. K2 then p st from cn.
Cr3L = cross 3 left worked thus: sl 2 sts onto cn and leave at the front of the work. P1 then k sts from cn.
C5R = cable 5 right worked thus: sl 3 sts onto cn and leave at back of work. K2, replace 3rd st from cn back onto the left needle. Bring cn to front. P1 then k 2 sts from cn.
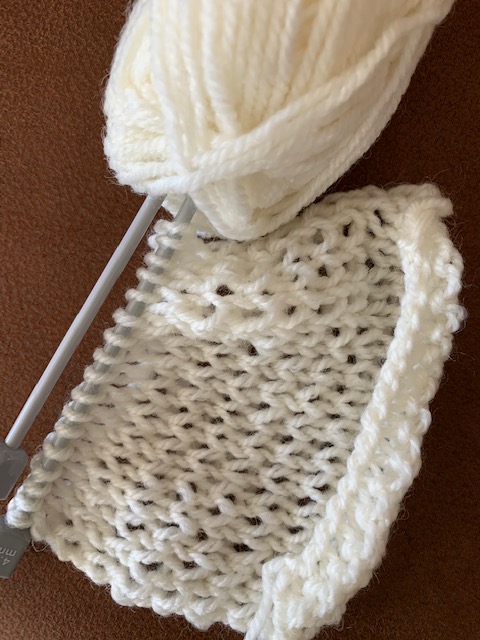
Dropped Stitch Knitting
This is a basic knitting stitch that I am really enjoying at the moment, because I am knitting myself a summer top using this pattern, and it is so quick and easy.
If you want to do a tester for yourself, here is a mini pattern.
Cast on 31 stitches.
Knit four rows.
Pattern:
Row 1: k6, *k5, 5W* Last six stitches 5W and k1.
Row 2: P to end of row dropping the extra loops.
Next 4 Rows: k
Row 7: k1 *5W, k5* to last stitch and K1.
Next 4 Rows: k
If you are wondering how to do 5W, you simply wind the wool around the needle three times instead of once for the next 5 stitches.
On the following row, you purl one of the three loops, and the rest just get pulled off of the needle to make the holes you see.
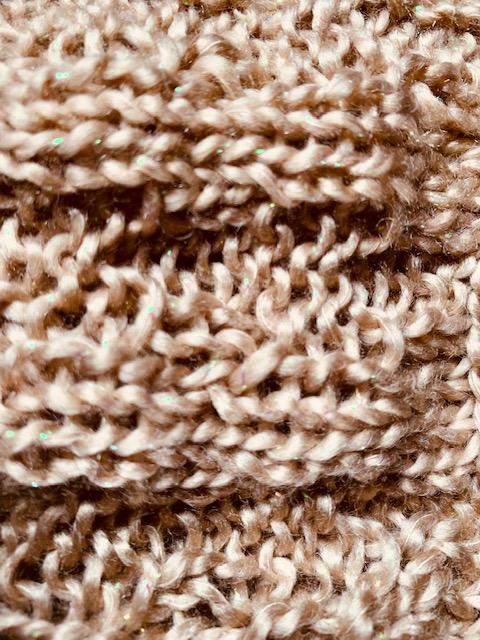
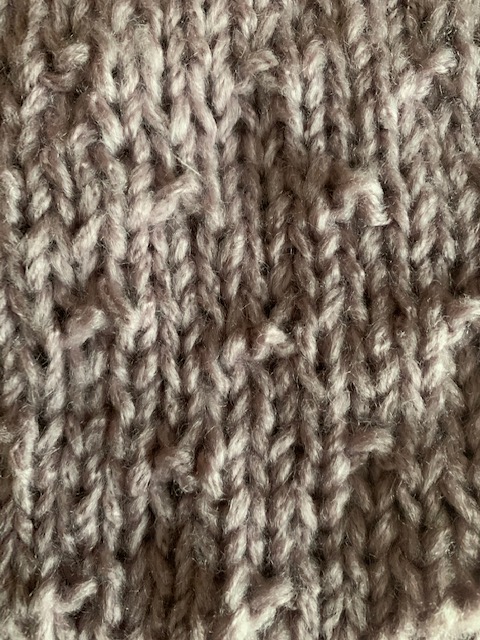
Fisherman’s Rib
This stitch is totally reversible and here are two pictures of both sides of the completed fisherman’s rib.
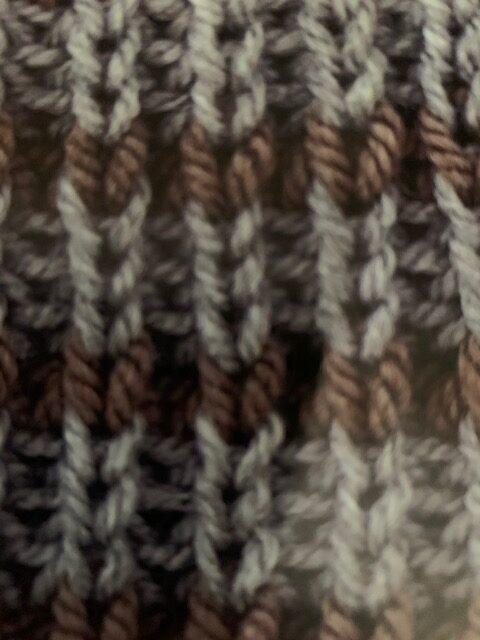
This stitch is made by repeating two rows.
Cast on an odd number of stitches.
Row 1: K to end.
Row 2: P1, *K1B, p1, rep from * to end.
To do K1B you simply insert the needle into the next stitch one stitch below the stitch you want to knit.
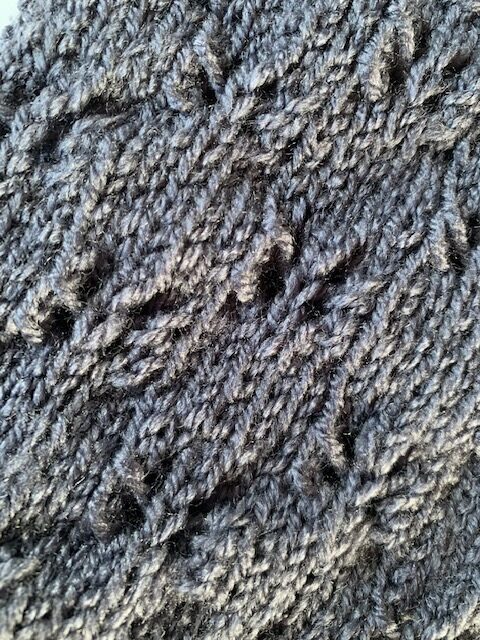
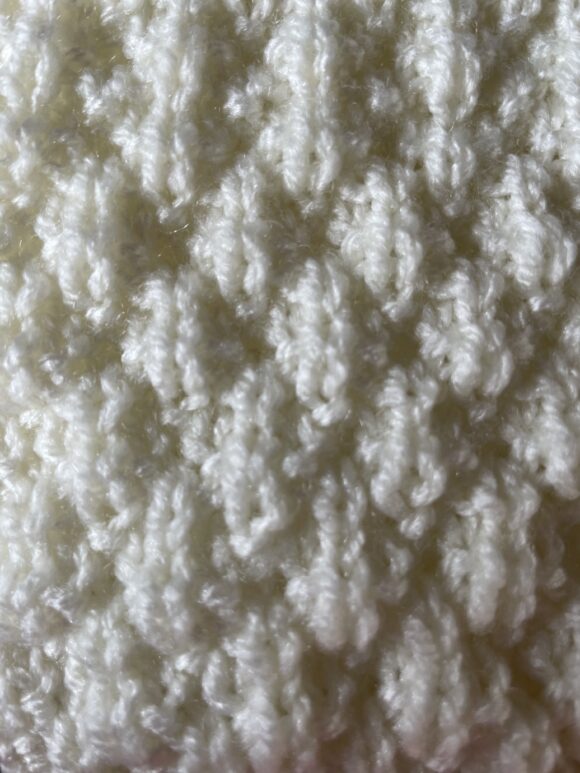
Embossed Diamonds
This is a mixture of moss stitch on a stocking stitch background.
You will need to cast on a multiple of 10 stitches plus 3 extra stitches to make this work.
For this example, I have used 23 stitches.
Row 1 (rs): P1, k1, p1, *(k3, p1) twice, k1, p1. Rep from * to end.
Row 2: P1, k1, *P3, k1, p1, k1, p3, k1. Rep from * to last st, p1.
Row 3: K4, (p1,k1) twice, p1, k5, (p1, k1) twice, p1, k4.
Row 4: P3, *(k1, p1) 3 times, k1, p3. Rep from * to end.
Row 5: Repeat row 3.
Row 6: Rep row 2.
Row 7: Rep row 1.
Row 8: P1, k1, p1, *k1, p5, (k1, p1) twice. Rep from * to end.
Row 9: (p1, k1) twice, p1, k3, (p1, k1) 3 times, p1, k3, (p1, k1) twice, p1.
Row 10: Rep row 8.
These 10 rows form the embossed diamond pattern. This type of pattern is lovely for a Baby’s Jersey or Blanket.
Eyelet Lace Stitch
Lace stitch looks so complicated, but in fact, it is one of the easiest basic knitting stitches out there. You just need to concentrate on which row you are on as it is easy to forget where you are.
For this example, I am using 5.5 mm needles and 30 stitches
Row 1 (rs): *k4, k2tog, yfd, rep from * to last 6 sts, k6.
Row 2: p to end.
Row 3: k6, *yfd, sl 1, psso, k4, rep from * to end.
Row 4: p to end.
These 4 rows form the eyelet lace stitch pattern. You can find more knitted lace patterns here.
Gatalin Rock Stitch
This is one of those pretty easy basic knitting stitches to knit, but you do need to concentrate otherwise you will make mistakes.
This is an example with 25 stitches.
After casting on knit rows as follows:
Row 1: (rs): k to end.
Row 2: p1, *k2, p1, rep from * to end.
Rows 3 and 4: Rep rows 1 and 2.
Row 5: k to end.
Row 6: k2, p1, *k3, p1, rep from * to last 2 sts. k2.
Rows 7 and 8: Rep rows 5 and 6.
These eight rows form the pattern.
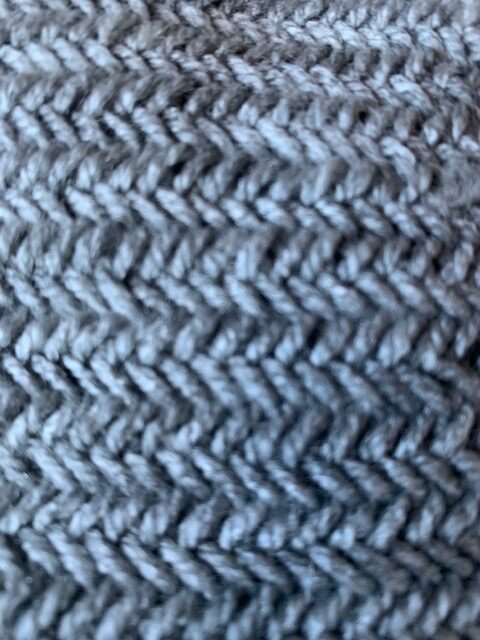
Herringbone Stitch
I found this stitch rather uncomfortable to knit a first, then I made my tension looser and it became far easier.
Start with a pair of knitting needles that are two sizes smaller than required for your pattern and cast on an odd number of stitches.
Cast on with the smaller needles and purl one row before changing to your bigger needles for the pattern rows.
Row 1: K2tog tbl dropping only the first st off the left needle. *K2tog tbl the rem st and the next st dropping only the first st off the left needle. Rep from * until 1 st remains on the left needle. K1 tbl.
Row 2: P2tog dropping only the first st off the left needle. *P2tog the rem st and the next st dropping only the first st off the left needle. Rep from * until 1 st remains on the left needle. P1.
Extra Instructions: tbl means knit through the back of the stitch. Let only the first stitch drop from the needle then knit the next stitch again with the following stitch. So you are actually knitting each stitch twice.
When casting off, use the smaller needle size again.
Horizontal Dash Stitch
This stitch is very easy and it looks like dashes going across your knitting. The only stitch used here is stocking stitch – plain and purl.
Cast on a multiple of 10 stitches plus six.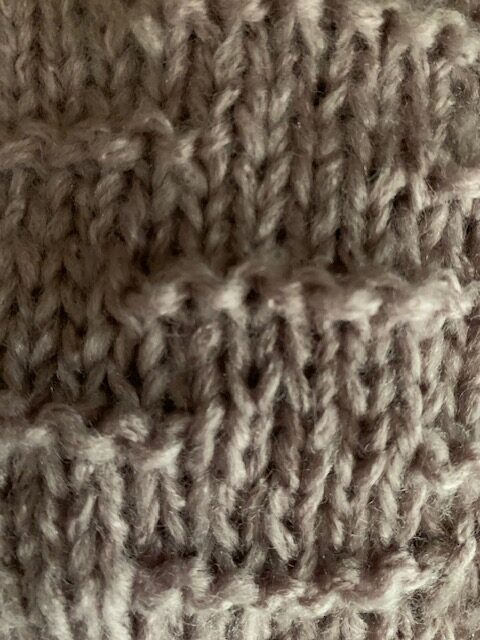
Row 1: (rs) K to end.
Row 2: P to end.
Row 3: K to end.
Row 4: K1, *p4, k6, p4.* Rep * to * to last stitch and k1.
Row 5 to 7: Rep rows 1 to 3.
Row 8: K6, p4, K6 for the entire row.
Lattice Stitch
This stitch reminds me of a picket fence. It does require a little practice first.
 Cast on a multiple of five stitches plus 2.
You will need two color yarns.
Row 1: (ws) With yarn color A k1, sl3 p-wise with yarn at the back, p1. *sl 5 p-wise with yarn at back, p1, rep from * to last 4 sts, sl3 p-wise with yarn at the back, k1.
Join color B.
Row 2: With color B, k to end.
Row 3: With color B, p to end.
Row 4: With color A, k1, pick up thread 3 rows below from underneath and k tog with next st. *sl5 p-wise with yarn at back, pick up thread 3 rows below and k tog with next st, rep from * to last st, k1.
Row 5: With color A, k1, sl1 p-wise with yarn at front. *sl5 p-wise with yarn at back. Sl1 p-wise with yarn at front. Rep from * to last st, k1.
Row 6: With color B, k to end.
Row 7: With color B, p to end.
Row 8: With color A, k1, sl3 p-wise with yarn at back. Pick up thread 3 rows below and k tog with next st. *Sl5 p-wise with yarn at back, pick up thread 3 rows below and k tog with next st. Rep from * to last 4 sts. Sl3 p-wise with yarn at back. K1.
These 8 rows form the pattern.
Little Squares Stitch
You will need to have two different color yarns for this.
For this example, I will cast on 29 sts with yarn number 1.
Still using yarn 1 knit one row and then purl 1 row.
Join yarn color number 2 and work loosely up the side of the knitting using the two colors.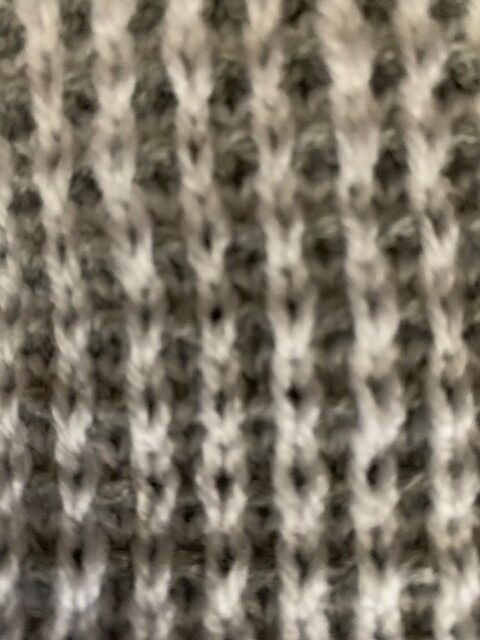
Row 1(rs): With yarn color 2, k1. *sl 1 p-wise with yarn at back. K1. rep from * to end.
Row 2: Still with yarn color 2, k1. *Sl 1 p-wise with yarn at front. k1 with yarn to back again. rep from * to end.
Row 3: With color 1 knit to the end.
Row 4: With color 1 purl to end.
Rep these four rows as they form the pattern as seen here.
End your pattern by doing one knit row and one purl row in color 1.
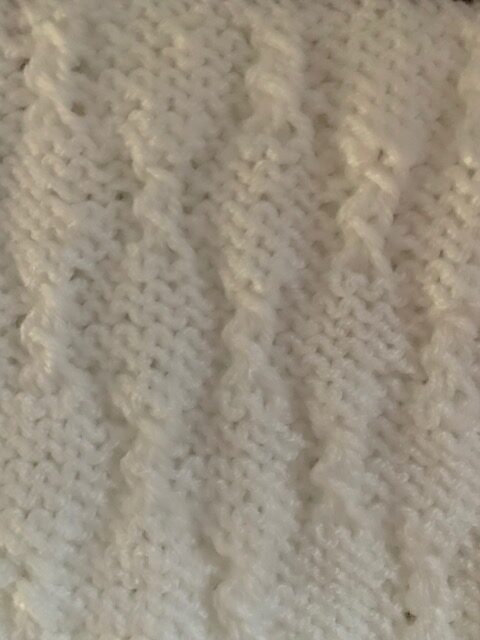
Little ZigZag Stitch
For this pattern, you will need a cable needle, but I used a large safety pin, which worked fine.
Here you will need to have a multiple of 6 stitches.
Cast on.
Row 1 (rs): K1. *Cr3L, k3, rep from * to last st, k1.
Row 2 and every following alt row: P to end.
Row 3: K2. Cr3L, k3, rep from * to end.
Row 5: *K3. Cr3L, rep from * to last 2 sts, k2.
Row 7: K4. Cr3L, *k3, Cr3L, rep from * to last st, k1.
Row 9: K4. Cr3R, *k3, Cr3R, rep from * to last st, k1.
Row 11: *K3. Cr3R, rep from * to last 2 sts, k2.
Row 13: K2. *Cr3R, k3, rep from * to end.
Row 15: K1. *Cr3R, k3, rep from * to last st, k1.
Row 16: P to end.
These 16 rows form the pattern of one complete zigzag.
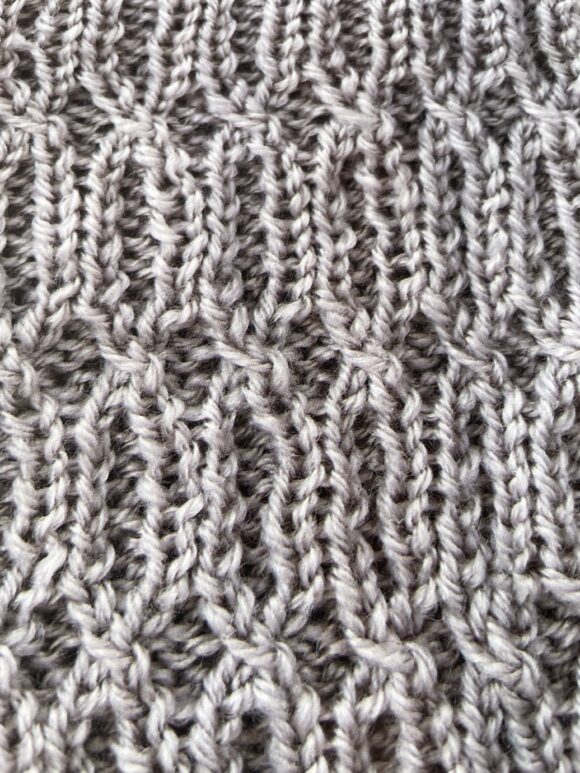
Mock English Rib
This interesting texture is created with just two pattern rows.
If you cast on 23 stitches, you will work the rows as follows: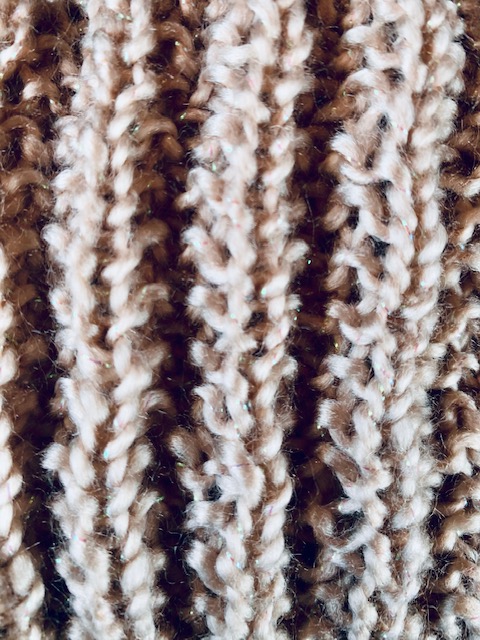
Row 1 (rs): K3, *p1, k3, rep from * to end.
Row 2: K1, p1, *k3, p1, rep from * to last st, k1.
These two rows form the pattern for this knitting stitch.
Moss Stitch
For this example, I am using 3.5mm needles and an odd number of stitches.
Row 1 (rs): *p1, k1, rep from * to end.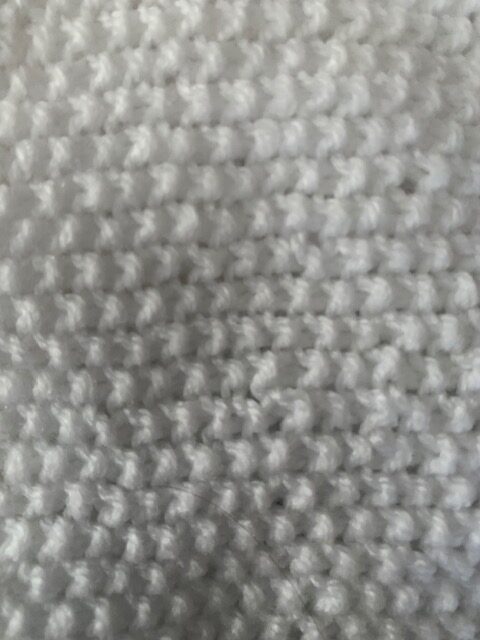
Row 2: As row 1
Row 3: *k1, p1, rep from * to end.
Row 4: As per row 3
These 4 rows form the moss stitch pattern
Double Moss Stitch
For double moss stitch, you would simply knit two rows the same and then alternate the next two rows as above.
So you would start the 1st row with k2, p2, and the same with the second row, providing you have an even amount of stitches on your needle.
The next two rows after that would start with p2, k2 all across the row. You repeat these four rows to create a slightly bulkier pattern than the basic moss stitch above.
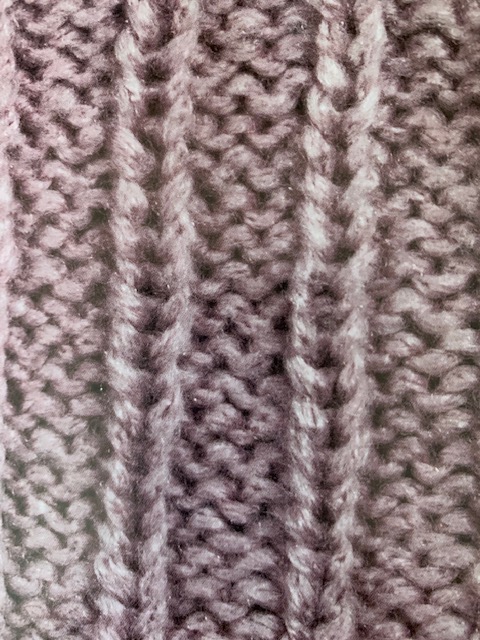
Moss Stitch Rib
This is an interesting-looking rib stitch and quite attractive if knitted loosely.
Cast on a multiple of 5 stitches and add two then work the pattern as follows:
Row 1: K3, *p1, k4, rep from * to last 4 sts, p1, k3.
Row 2: P2, *k1, p1, k1, p2, rep from * to end.
These two rows form the pattern.
Openwork Lace Stitch
This basic knitting stitch will need a multiple of 6 stitches plus 3.
Purl the first row after casting on.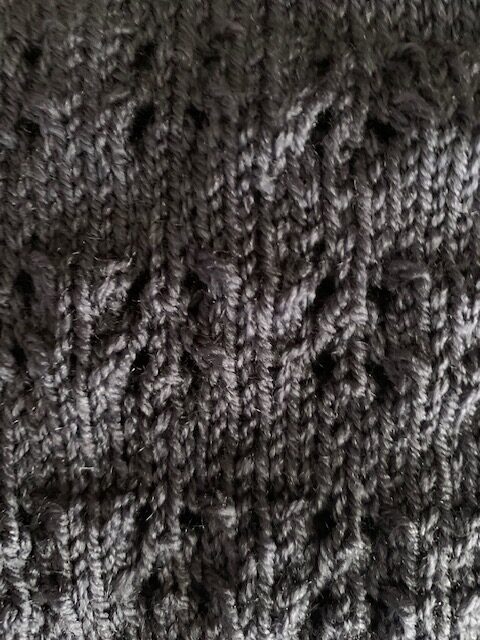
Row 1: K to end.
Row 2: P to end.
Rows 3 and 4: Rep rows 1 and 2.
Row 5: K2, *k2tog, yfd, k1, yfd, skpo, k1, rep from * to last st, k1.
Row 6: P to end.
Rows 7 and 8: Rep rows 1 and 2.
Row 9: Rep row 5.
Row 10: P to end.
Rows 11 and 12: Rep rows 1 and 2.
These 12 rows from the pattern.
Openwork Ladder Stitch
This is one of those easy basic knitting stitches. It is worked over two rows and stitches are increased and decreased, so make sure that you have the correct number of stitches at the end of each row.
You will need a multiple of six stitches plus 1 to knit this pattern.
For my example I cast on 19 stitches.
Row 1: K1, *skpo, yfd, k1, yfd, k2tog, k1, rep from * to end.
Row 2: P3, k1, *p5, k1, rep from * to last 3 sts, p3.
These two rows form the pattern.
Here is a broader explanation of Row 1 above.
Row 1: Knit the first stitch, slip the next stitch knitwise, knit 1, then pass the slipped stitch over the knit stitch (this is abbreviated as skpo).
Bring the yarn to the front of the knitting between the needles (this is abbreviated at yfd).
Knit the next stitch and the yarn will lay across the right needle creating another stitch.
Place the yarn in front again and knit 2 stitches together (this is abbreviated as k2tog). Then knit 1 and repeat to the end of the row. This forms the eyelets in the knitting.
Pique Stitch
This stitch is a combination of garter and stocking stitch and it creates a blocked type pattern.
For Pique stitch, you will need to work with a multiple of six stitches plus 2.
Row 1: K to end.
Row 2: K2, *p4, k2. Rep from * to end.
Rows 3 to 10: Rep rows 1 and 2 four times.
Row 11: K to end.
Row 12: P3, k2, *p4, k2 rep from * to last 3 sts, p3.
Rows 13 to 20: Rep rows 11 and 12 four times.
These 20 rows form the pattern.
Ribbing
There are a few variations of ribbing.
3 x 1 Rib
 Row 1 (ws): k1, *p1 k3 and then rep from * ending row with a p1, k1.
Row 2: k2, *p3, k1 and then rep from * to last st k1.
These two rows form the pattern for 3 x 1 ribbing.
Ribbon Stitch
This is a combination of stocking stitch and garter stitch and is worked in two colors.
With color number 1 cast on 27 sts for this example.
Using color 1 knit one row and then purl 1 row.
Join color number two and work the two colors together stranding them loosely up the side of the knitting.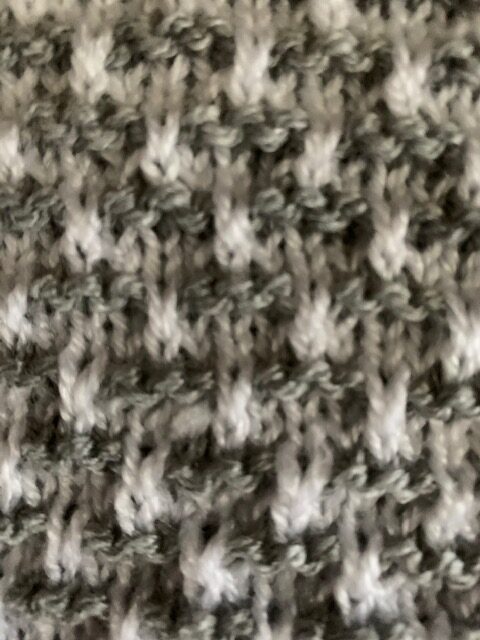
Row 1 (rs): With color 2 k3. *Sl 1 p-wise with yarn at back, k3. Rep from * to end.
Row 2: With color 2 k3. *Sl 1 p-wise with yarn at front, k3. Rep from * to end.
Row 3: With color 1, k to end.
Row 4: With color 1, p to end.
Row 5: With color 2, k1. *Sl 1 p-wise with yarn at back, k3. Rep from * to last 2 sts. Sl 1 p-wise with yarn at back.
Row 6: With color 2, k1. *Sl 1 p-wise with yarn at front. K3. Rep from * to last 2 sts. Sl 1 p-wise with yarn at front.
Row 7: With color 1, k to end.
Row 8: With color 1, p to end.
These 8 rows form the ribbon stitch pattern.
When done end with color 1 and knit one row, then purl one row to finish off.
Ripple Pattern
This is one of the most basic knitting stitches or patterns to try as it is simply a mixture of Purl and Plain stitch.
Simply repeat this pattern over and over: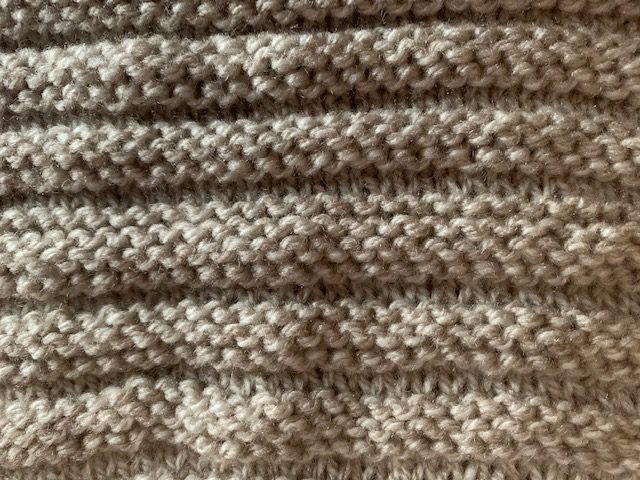
Row 1(rs): k to end.
Row 2: p to end.
Row 3: k to end.
Row 4: k to end.
Row 5: p to end.
Row 6: k to end.
Simply knit the pattern over and over until you have your desired length.
Seed Stitch
This is similar to Moss Stitch and looks like moss stitch, but you must have an even number of stitches on your needles.
Row 1 (rs): *p1, k1, rep from * to end.
Row 2: *k1, p1, rep from * to end.
Seersucker Stitch
Seersucker stitch is easy to do as it is worked in a combination of knit and purl stitches. It has a raised texture that resembles seersucker fabric.
Cast on a multiple of 4 stitches plus 3.
Row 1: (rs) K2, *p1, k1, rep from * to last st, k1.
Row 2: P2, *k1, p1, rep from * to last st, p1.
Row 3: K1, p1, *k3, p1, rep from * to last st, k1.
Row 4: P1, k1, *p3, k1, rep from * to last st, p1.
Row 5 and 6: Rep rows 1 and 2.
Row 7: K3, *p1, k3, rep from * to end.
Row 8: P3, *k1, p3, rep from * to end.
These 8 rows form the pattern.
Small Cable Lattice Stitch
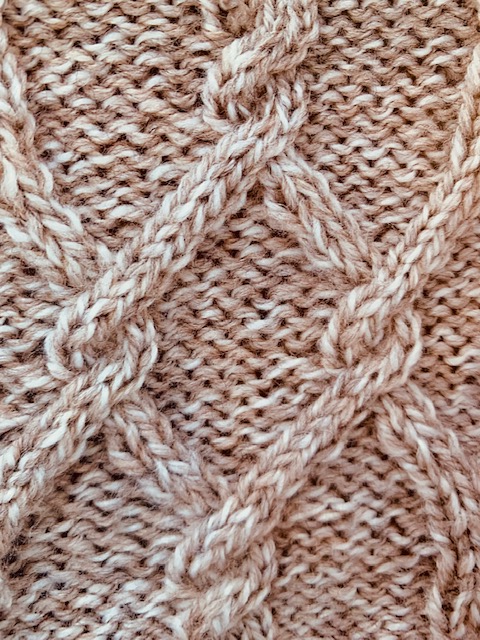
For this stitch, you will need a cable needle or stitch holder.
This pattern is for one lattice pattern as seen here and this uses 26 stitches.
Row 1 (ws): K3, p2, k6, p4, k6, p2, k3.
Row 2: P3, k2, p6, k4, p6, k2, p3.
Row 3: K3, p2, k6, p4, k6, p2, k3.
Row 4: P3, k2, p6, C4B, p6, k2, p3.
Row 5 to 8: Rep rows 1 to 4.
Row 9: Rep row 1.
Row 10: P3, (Cr3L, p4, Cr3R) twice, p3.
Row 11: (k4, p2) twice, k2, (p2, k4) twice.
Row 12: P3 (p1 Cr3L, p2, Cr3R, p1) twice, p3.
Row 13: K5, p2, k2, p2, k4, p2, k2, p2, k5.
Row 14: P3 (p2, Cr3L, Cr3R, p2) twice, p3.
Row 15: K6, (p4, k6) twice.
Row 16: P6, (C4B, p6) twice.
Row 17: Rep row 15.
Row 18: P6, (k4, p6) twice.
Rows 19 and 20: Rep rows 15 and 16.
Row 21: Rep row 15.
Row 22: P3 (p2, Cr3R, Cr3L, p1) twice, p3.
Row 23: Rep row 13.
Row 24: P3, (p1, Cr3R, p2, Cr3L, p1) twice, p3.
Row 25: Rep row 11.
Row 26: P3, (Cr3R, p4, Cr3L) twice, p3.
Rows 27 and 28: Rep rows 3 and 4.
Rows 29 to 32: Rep rows 1 to 4.
Rows 33 and 34: Rep rows 1 and 2.
Row 35: Rep row 1.
These 35 rows form the pattern.
Spot Stitch
Cast on a multiple of 4 stitches plus 1 to work this spot pattern stitch.
Row 1 (RS): K to end.
Row 2: P to end.
Row 3: K to end.
Row 4: K1, *p3, k1, rep from * to end.
Rows 5 to 7: Rep rows 1 to 3.
Row 8: P2, k1, *p3, k1, rep from * to last 2 sts, p2.
SSK Knitting
This stands for slip, slip, knit and you can get a full explanation on how to do this knitting stitch by clicking here.
Staggered Slip Stitch
With a Staggered slip stitch, you will need to cast on a multiple of 8 stitches plus 6.
Row 1 (rs): P to end.
Row 2: K6, *p2, k6, rep from * to end.
Row 3: P6, *sl 1 p-wise with yarn at back, k1, yfwd, psso the 2 sts, p6, rep from * to end.
(Here you are slipping the stitch p-wise onto your right needle then knitting the next stitch. You then bring the yarn to the front and take it around the right needle and back to the front again (yfwd) then pass the slipped stitch over this newly made stitch.
Rows 4 and 5: Rep rows 2 and 3.
Row 6: Rep row 2.
Row 7: P to end.
Row 8: K2, p2, *k6, p2, rep from * to last 2 sts, k2.
Row 9: P2, sl1 p-wise with yarn at back, k1, yfwd, psso the 2 sts. *p6, sl1 p-wise with yarn at the back, k1, yfwd, psso the 2 sts, rep from * to last 2 sts.
Row 10 and 11: Rep rows 8 and 9.
Row 12: Rep row 8.
These 12 rows form the pattern.
3 X 3 Rib Pattern
Cast on a multiple of 6 stitches plus 3 to work the 3 x 3 rib pattern.

Row 1 (RS): K3, *p3, k3, rep from * to and of row.
Row 2: P3, *k2, p3, rep from * to end of the row.
These two rows form the pattern.
Stocking Stitch with Eyelets
For this example, I am using 4 mm needles and 36 stitches
Row 1 (rs): k to end.
Row 2: p to end.
Row 3 and 4: As per rows 1 and 2.
Row 5: k5, yfd, k2tog, *k6, yfd, k2tog, rep from * to last 5 sts, k to end.
Row 6: p to end.
Row 7 to 10: Work rows 1 and 2 twice.
Row 11: k9, yfd, k2tog, *k6, yfd, k2tog, rep from * to last 9 sts, k to end.
Row 12: p to end.
These 12 rows form the pattern.
Textured Pattern
This pattern is really simple and definitely falls under basic knitting stitches.
Here is a pattern working over 36sts, but the pattern can be used with any number of stitches.
Cast on 36 sts.
Row 1: (rs) k to end.
Row 2: (ws) purl to end.
Row 3: k3, p2, *k5, p2, rep from * to last 3 sts, k3.
Row 4: p3, k2, *p5, k2, rep from * to last 3 sts, p3.
Row 5: k to end.
Row 6: p to end.
These 6 rows will form the pattern.
Tulle Stitch
This stitch reminds me of crochet, as it involves passing made stitches over pairs of knitted stitches to bind them together.
Cast on a multiple of 2 stitches. So in other words any number of even stitches, depending on what you are making.
P 1 row before starting the pattern as follows:
Row 1 (rs): K1, *yfd, k2, pass the yfd over the 2 k sts, rep from * to last st, k1. (in other words, you are passing the stitch you made by putting the yarn forward over the two knitted stitches)
Row 2: P to end.
Row 3: K2, *yfd, k2, pass the yfd over the 2 k sts, rep from * to last 2 sts, k2.
Row 4: P to end.
These four rows above form the pattern.
Van Dyke Stitch
For this example, I use 3.5 mm needles and 44 stitches
Row 1 (rs): k8, yfd, sl 1, k1, psso, *k11, yfd, sl 1, k1, psso, rep from * to last 8 sts, k 8
Row 2: and every foll alt row: p to end
Row 3: k6, k2tog, yfd, k1, yfd, sl 1, k1, psso, *k8, k2 tog, yfd, k1, yfd, sl 1, k1, psso, rep from * to last 7 sts, k7
Row 5: K5, k2tog, yfd, k3, yfd, sl 1, k1, psso, *k6, k2 tog, yfd, k3, yfd, sl 1, k1, psso, rep from * to last 6 sts, k6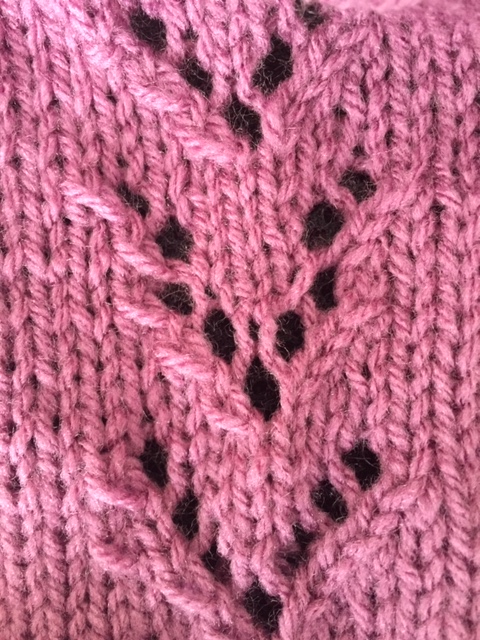
Row 7: *k4, k2tog, yfd, k5, yfd, sl 1, k1, psso, rep from * to last 5 sts, k5
Row 8: p to end
These 8 rows form the pattern.
Vertical Lace Stitch
For this example, I use 3.5 mm needles and 44 stitches
Row 1 (rs): p2, *k2tog, yfd, k1, yfd, sl 1, k1 psso, p2 rep from * to end
Row 2: k2, *p5, k2, rep from * to end
These 2 rows form the pattern.
Wasp Nest Stitch
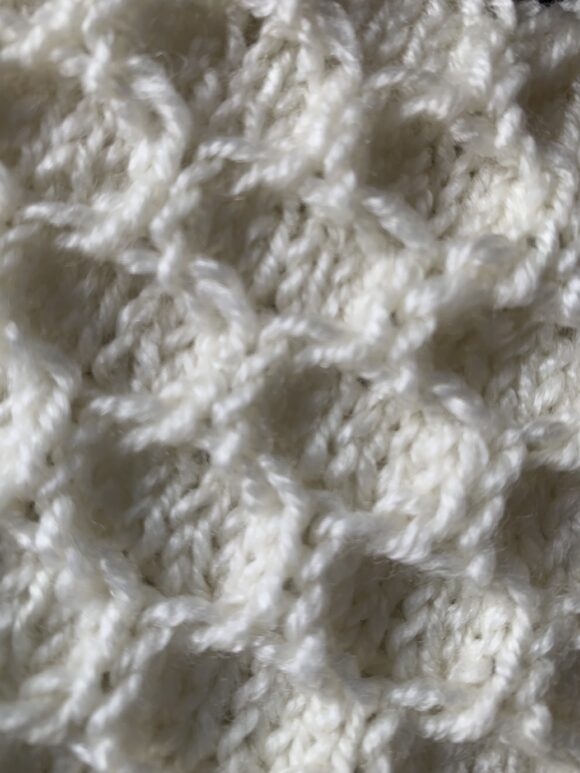
For wasp nest stitch you will need to cast on a multiple of 6 stitches. You will also need a cable needle.
Cast on the required number of stitches.
Row 1: (rs) K to end.
Row 2: P to end.
Row 3: *C3B, C3F, rep from * to end.
Row 4: P to end.
Row 5: K to end.
Row 6: P to end.
Row 7: *C3F, C3B, rep from * to end.
Row 8: P to end.
These eight rows form the wasp nest pattern you see above.
Special Note: C3B = cable 3 back – slip 2 sts onto cable needle and leave at back of work, knit 1, then knit stitches from the cable needle. C3F = cable 3 front – slip 1 st onto cable needle and leave at front of work, knit 2 then knit stitch from cable needle.
Trust that you have loads of fun experimenting with these basic knitting stitches.