 Do you know how to make i cords, or any type of cords for that matter? Here are some i cord instructions for you and also how to make various different types of cords.
This post does contain affiliate links.
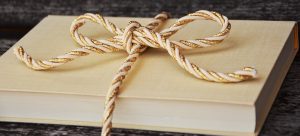
i cords have many uses both in and around the home and in your craft projects. They are also an attractive way to tie up gifts with cards, or in fact, tie anything together. My daughter uses them to make jewelry for herself. A lot of knitters also use cords on completed knitting projects.

Cords are also great to use in your scrapbooking. If you make the cords yourself, you can select your own colors so that your cords will blend in with your scrapbooking layout. Embroidery floss is ideal for the making of cords, and also comes in an extensive and beautiful array of colors. The strands are easy to separate, and in this way, you can combine different shades to create multicolored cords.
How To Make Cords
Twisted Cords:
If you want a twisted cord, it is best to have a friend or family member at hand who can help you by holding the ends together as you twist. If you don’t, a door handle also works quite well.
Cut the strands longer than you want your finished cord to be, as the twisting is going to make them a lot shorter. You will be able to choose how thick or thin you want your cord to be by adding or subtracting strands.
First of all, you will need to cut your embroidery cotton at least 30% longer than you want the finished cord to be. Knot them together at one end and separate the strands into two groups. Try to have the same number of strands in each group.
Get your helper to hold the knotted end, or if you have nobody around to ask, you can tie it to a steady anchor. Holding one group of strands in each hand, twist both groups in the same direction. Continue to twist until the cords begin to kink. Bring the ends together and ask your helper to let go, or untie it from your anchor. Allow the strands to coil up and twist around one another. When they stop moving, pull the cord straight and knot the loose ends. Trim and fluff the floss ends.
Braided Cords:
For braided cords, you can be even more creative by threading small embellishments onto the cord as you braid. You can also use floss of different colors to compliment your layout. Adding a tassel to the end will also greatly complement your finished cord. Find out how to make tassels by clicking here.
First cut three lengths of embroidery floss a little longer than twice the length that you would like your finished cord to be. Hold them together and thread them through one of the items that you want to hang on your layout. Push the item halfway down the floss. You may also need the help of a friend’s finger or a door handle now.
Next, fold the floss in half around the item bringing the two ends together. Use each doubled group of strands as one and tightly braid them together. When you have completed the braid, knot the loose ends together and use the cord as intended.
To hang your cord onto a scrapbooking layout, push the arms of a brad through the braided cord, and then through a hole on your page to secure it.
i Cord Instructions:
Here is a helpful video that I found online of i cord instructions made easy that will help you to knit your own i cord in no time at all.
So now that you know how to make cords, what are you waiting for?
get to work……