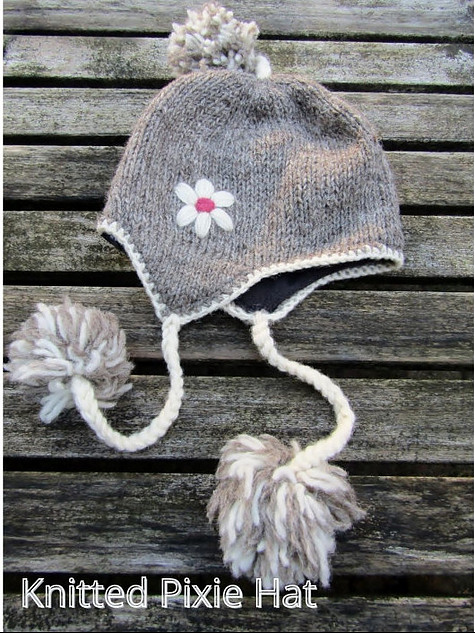
This delightful knitted pixie hat pattern has earflaps for warmth. It is knitted in a variety of bright colors and is an ideal way to use up odds and ends of wool. The cute pompoms are of course optional.
This hat is knitted in one main color, but there is nothing stopping you from adding your own embellishments like the flower (below) or some embroidered patterns using the swiss darning technique with various colors of leftover yarn on the top of the hat.
This post may contain affiliate links, which means that I will get a small commission if you decide to purchase anything on this page.
Knitted Pixie Hat Pattern
 Measurements:
This hat will fit a baby of 0-6(9-18; 18-24) months.
The circumference of the hat is 36(44; 48) cm.
The length is 20(24; 28) cm.
These instructions are given for the smallest size with the larger sizes in brackets ( ). One set of figures means that it applies to all the sizes.
When you have a pattern like this one that has various sizes, it is a good idea to read through it first and use a highlighter pen to mark the instructions applicable to the size that you are knitting.
Materials:
Use any chunky yarn. It is better to avoid 100 percent pure wool as it may irritate a baby’s delicate or sensitive skin.
1(2; 2) x 50 g balls of chunky yarn in a color of your choice.
Oddments of chunky yarn for some multicolor pom-poms and any embroidery work you may want to do.
1 pair of 5 mm knitting needles.
1 pair of 4,5 mm double-pointed knitting needles to make the strings.
2 stitch holders or safety pins
A tapestry needle.
Abbreviations:
You can see a full list of abbreviations for this pattern in this knitting dictionary.
Tension:
16 sts and 24 rows to 10 cm measured over st st using 5 mm needles.
EarFlaps – Make Two Alike:
Using 5 mm needles cast on 1 st.
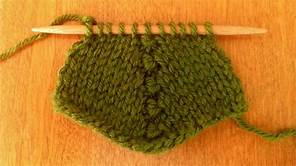
1st Row (RS): K1, p1, k1 into this st (3sts).
2nd Row: P.
Beg with a k row, work in st st inc 1 st at each end of the next and every foll alt row until there are 15(19; 23) sts on the needles, ending with a WS row.
Leave these sts on a st holder or a safety pin.
Hat:
Using 5mm needles c/on 7(9; 11) sts, k across the 15(19; 23) sts held on the st holder for one earflap. C/on 12(14; 16) sts, k across 15 (19; 23) sts held on the st holder for the second earflap, c/on 7(9; 11) sts [56(70; 84) sts].
Starting with a p row work in st st on these sts for 17(21; 25) rows.
Shape Top:
1st Row (RS): K8(10; 12), k3 tog, k15(20; 25), k3 tog, k15(20; 25), k3 tog, k9 (11; 13) [50(64; 78) sts].
2nd and every foll alt row: p.
3rd Row: K7(9; 11), k3 tog, k13(18; 23), k3 tog, k13(18; 23), k3 tog, k8(10;12) [44(58; 72)sts].
5th Row: K6(8;10), k3 tog, k11(16; 21), k3 tog, k11(16; 21), k3 tog, k7 (9; 11) [38(52; 66)sts].
7th Row: K5(7; 9), k3 tog, k9(14; 19), k3 tog, k9(14; 19), k3 tog, k6(8; 10) [32(46; 60) sts].
9th Row: K4(6;8), k3 tog, k7(12; 17), k3 tog, k7(12; 17), k3 tog, k5(7; 9) [26(40; 54)sts].
11th Row: K3(5; 7), k3 tog, k5(10; 15), K3 tog, k5(10; 15), k3 tog, k4(6; 8) [20(32; 48)sts].
13th Row: K2(4; 6), k3 tog, k3(8; 13), k3 tog, k3(8; 13), k3 tog, k3(5; 7) [14(26; 42)sts].
15th Row: K1(3; 5), k3 tog, k1(6; 11), K3 tog, k1(6; 11), k3 tog, k2(4; 6) [8(20; 36)sts].
For 1st size only:
17th Row: K1, k3 tog, k1, k3 tog, [4 sts].
For 2nd size only:
17th Row: K2, k3 tog, k4, k3 tog, k4, k3 tog [14 sts].
19th Row: K1, k3 tog, k2, k3 tog, k2. k3 tog, k2 [8 sts].
21st Row: [K3 tog] 3 times, k1[4 sts].
For 3rd size only:
17th Row: K4, k3 tog, k9, k3 tog, k9, k3 tog, k5 [30 sts].
19th Row: K3, k3 tog, k7, k3 tog, k7. k3 tog, k4 [24 sts].
21st Row: K2, k3 tog, k5, k3 tog, k5. k3 tog, k3 [18 sts].
23rd Row: K1, k3 tog, k3, k3 tog, k2 [12 sts].
25th Row: [K3 tog, k1] 3 times [6 sts].
Hat Trim:
Cut the yarn, leaving a long end. Thread yarn through rem sts and pull tight to secure. Join hat at back with a flat seam.
Using 5mm needles and a contrasting color yarn, starting at the center back seam, pick up 1 st at the edge, k this st * pick up and k next stitch, put this stitch back onto the left-hand n and k it, now c/off st on right-hand n.
Rep from * all around the edge of the hat. Fasten off and sew in loose ends of yarn at the back of the work.
Neck Ties – make two alike:
Using 4,5 mm double-pointed ns and contrasting colored yarn, c/on 3 sts.
1st Row (RS): K3, *without turning slide these sts to the opposite end of N and bring yarn to the opposite end of work, pulling it quite tightly across the WS of the work, k these 3 sts again, rep from * until the tie measures about 20cm. c/off.
How To Make The Pompoms For Your Knitted Pixie Hat Pattern:
Cut two cardboard circles of about 6,5 cm in diameter, then cut another hole in the centre of each to make a ring or simply use your pompom makers if you have some.


Wind a small amount of matching or contrasting color yarn into a ball that will pass throgh the centre of the ring. Hold the cardboard circles together and wind the yarn around the ring, keeping the strands close together. Wind as many layers of yarn as possible before the hole becomes too small for the yarn to pass through.
Slip the blade of sharp scissors between the pieces of card and cut around the circumference. Slip a length of yarn between the cardboard layers, around the centre of what will be the pompom, pull tight and knot the yarn.
Cut the cardboard ring away. Fluff up the pom pom and trim to neaten.
Attach one to the end of the plaited tie. Sew a tie to each end of the earflap. Alternatively the pompom can be added to the tip of the hat.
