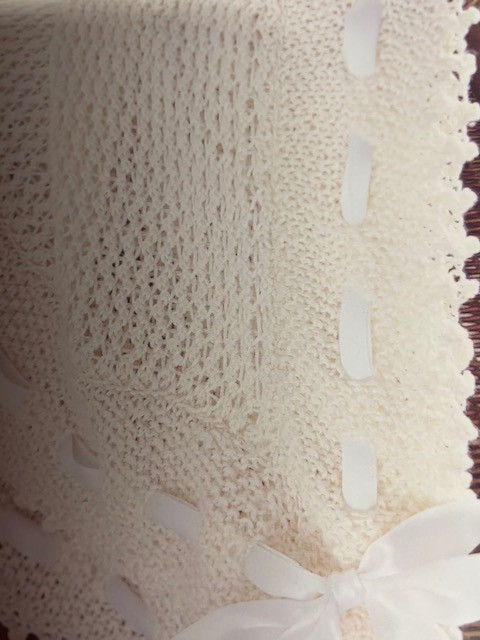
If you want to know how to knit a shawl, this beautiful lacy shawl is the perfect project for you. It is the perfect gift to celebrate a birth and it is something that will be treasured for years as it is so pretty.
The delicate lacy design is not too complicated and although it is knitted in a fine yarn, it is worked on large needles, so it doesn’t take too long to finish.

Knit A Lacy Shawl
Here is a knitting pattern to show you how to knit a shawl.
Tip:
If you are knitting with white or a light color, dust your hands with scented talcum powder. This will keep your work clean and free from grease. It also gives the finished garment a lovely smell.
Measurements:
This lacy shawl measures 86cm x 86 cm.
You Will Need:
Any 4-ply yarn in wool or cotton will work for this design. If you want to make it more luxurious, you can try yarn with silk or cashmere.
7 x 50g balls of 4 ply yarn in a soft color of your choice.
1 pair of 4,5 mm knitting needles
1 pair of 5 mm knitting needles
6 m satin ribbon 2.5 cm wide
Sewing needle
Abbreviations:
You can get a complete list of abbreviations for any knitting pattern here.
This blanket is knitted in five pieces.
The center panel is one piece and the borders are a separate strip for each of the four sides.
Center Panel:
Using 5mm needles, c/on 161 sts.
Work 1 row in p.
Work in lace patt as follows:
1st Row (RS): K1, *k2 tog, yfwd, rep from * to last 2 sts, k2.
2nd Row: P2, *sl 1 pwise (this is the st made from the previous row), p1; rep from * to last st, p1.
3rd Row: K2, *yfwd, sl 1, k1, psso, rep from * to last st, k1.
4th Row: Work as given for 2nd row.
These four rows form the lace patt.
Cont in patt until work measures 71 cm from the c/on edge, ending with 4th row of patt.
K last row.
C/off loosely, trying to work c/off row evenly for a neater edge.
Borders: (make four alike)
Using 4.5mm ns, c/on using the picot edge method as follows:
C/on Row: *C/on 5 sts, c/off 2 sts, sl the st from right-hand n back onto left-hand n, rep from * until there are 183 sts on the ns, c/on 2 sts [185 sts].
Now work in moss st patt as follows:
1st Row (Rs): K1, *k1, p1; rep from * to last 2 sts, k2.
2nd Row: Work as given for 1st row.
These two rows set the moss st patt and edge sts, and are repeated throughout.
At the same time, dec 1 st at each end of row on the very 1st row of the moss st patt and after that on every foll alt row until there are 175 sts on the ns.
Eyelet Row: K2, work the next 2 sts in moss st patt, *yfwd, k2 tog, work 3 sts in moss st patt; rep from * last 6 sts, yfwd, k2 tog, work 2 sts in moss st, k2.
Cont in patt, dec 1 st at each end of every alt row as before until 161 sts are on the Ns.
C/off in patt.
To Make Up:
Sew in loose ends of yarn at the back of the work.
Lay out the finished pieces and press gently according to the yarn instructions.
Sew the borders to the main panel with a slip stitch, using the same yarn.
Join the four strips together at the side where they meet at the corners.
To Complete:
Cut the ribbon into four equal lengths.
Thread the ribbon through the eyelet row of each border. Tie bows at each corner where the ribbons meet.
So now that you have the pattern, you should be able to knit a shawl with no problems.
Really great content, I personally don’t knit but my cousin does a lot, so I know a little bit about it. I should give it a try sometime. So much helpful information and easy-to-follow instructions about to make a shawl. It’s good to see people passionate about their hobbies. Wishing you all the best
James
Thanks for stopping by James and hope you do give knitting a try sometime.
Thank you for the great free knitting pattern. Because I thought of learning to do it and didn’t have a chance. i read your article I’ll give it a try Because I think giving gifts that we make ourselves would be more special. And I think knitting a shawl leaves a meditative practice as well. Wish me luck.
If you are a beginner, I would advise learning the basics first before trying this pattern, but you are right, it can be quite relaxing and meditative.