Because flower embellishments are so expensive to buy for your scrapbooking, here you can learn how to make scrapbook flowers at a fraction of the cost.
This post contains affiliate links which means that the owner of this website will get commissions on qualifying purchases, at no extra cost to the buyer.
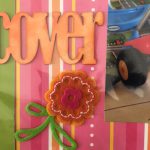
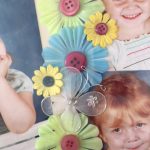
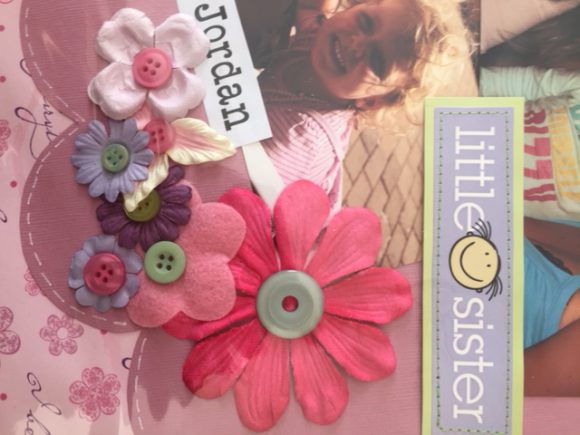
Flowers are one of my favourite types of embellishments, as they make layouts look vibrant and full of life. You can use them on so many different themes and layouts, and I like to sprinkle them around quite a lot of my
scrapbook layouts, as you can see from the pictures below. I also love using buttons to decorate my flowers.
Flowers work especially well for layouts of special occasions like wedding, or photo’s of little girls, or even photos on a spring or summer layout.
By using some of the ideas below, you can learn how to make scrapbook flowers and add some beautiful dimension to your scrapbooking layouts.
How To Make Scrapbook Flowers
Concertina Flowers
This involves cutting strips of paper and folding them concertina style and then arranging the strips around a button. The smaller the folds the better. as the flowers will look prettier and more delicate. To finish them off nicely, before folding the strips, Ink the outside edges. This is another great example of why we should never throw our scraps away.
Dried Flowers
Why not collect some flowers from your garden or your next field trip, and press and dry them out. You can even press them in small bouquets or arrangements to decorate your layouts. Be sure that they are completely dried out before using them in your layouts and cover them with a plastic see-through envelope or put them in a shaker box so you can protect your surrounding photographs in the long run.
Cardboard Flowers
Using scraps of different coloured cardstock cut out basic daisy flower designs. You can then ink the edges of the petals and layer the different colours on top of each other. Place a button or a brad in the middle of the flower. You can make the cut-outs the same size or different sizes that you can layer with the biggest one at the bottom and the smaller ones on top.
Circular Flowers
Once again, using those precious scraps, you can cut out small circles in different sizes. Ink around the circumference and then crumple the paper circles. For a more distressed look, you can also ink lightly in the creases. Flatten your circles and once again layer the circles with the biggest one at the bottom. Join them in the middle using either small buttons or brads. This method works particularly well using patterned paper.
As you can see from the examples above, with just a bit of extra time and effort, you can learn how to make scrapbook flowers with ease.
 If you want to take your flower making to the next level, this book might be just what you are looking for.
The Art of Paper Flowers makes it easy for anyone to create beautiful roses, orchids, tulips, and more–completely out of paper. There are over thirty different flowers included in the book, and each pattern is accompanied by a complete list of materials required, step-by-step instructions for creating the flower, original paper-folding techniques from the author, full-size patterns, and color photos for reference.
All the basic information is here in The Art of Paper Flowers for readers to make their own impressive paper flowers and even bouquets. From mastering the skill of paper manipulation to achieving seamless glueing and colouring practices, you’ll make flowers look incredibly realistic. Whether you’re creating gifts, decorations for an event, scrapbooking, or home decor, The Art of Paper Flowers will have you arranging stunning flowers in no time!
Related Posts
-
-
How To Scrapbook TagsHere are some nifty ideas on how you can scrapbook tags within your scrapbooking layouts…