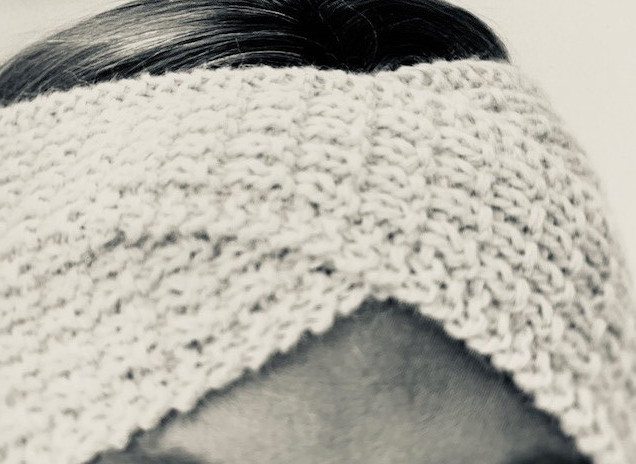
This is how to knit a headband in a combination of beautifully soft alpaca yarn using a textured rib stitch. This knitted headband has a simple twist at the centre front, which makes it a chic update on a classic design.
This is a great way to get rid of extra balls of yarn and if you need to make a quick gift for a friend then even better.

How To Knit A Headband
To knit this headband, two strands of yarn are used together to obtain an even finish. It is best to wind the two balls of yarn together before you start by taking the end from each ball and winding them together into one large ball.
Please note that this post may contain affiliate links.
You will need:
2 x 50g balls of Alpaca DK yarn
4.5 mm knitting needles
Yarn needle
You can buy the yarn online too. Find out how by clicking on one of the pictures below.


Size:
50cm in circumference x 11 cm wide
Tension:
22 sts and 32 rows = 10 cm over rib pattern, using 2 strands of yarn together.
Abbreviations:
See knitting abbreviations here.
To Make:
Using 4.5 mm knitting needles and 2 strands of yarn together, cast on 25 sts.
Rows 1 and 2: k to end.
Row 3 (rs): k2, *p1, k1, rep from * to last st, k1.
Row 4: k3, *p1, k1, rep from * to last 2 sts, k2.
These 4 rows above form the pattern.
Rep them 14 times more, then work rows 1 and 2 again.
Divide for twist:
Next row: k2, p1, (k1, p1) 4 times, k1 puk, turn and leave rem sts on a holder.
Work on first set of 13 sts as follows:
Next Row: k3, p 1(k1, p1) 3 times, k3.
Rep patt rows 1 to 4, eight times, so ending with a ws row.
Cut yarn and leave sts on a holder.
With rs facing, join yarn to sts on first holder, k2 p1, (k1, p1) 4 times, k2.
Next Row: k3, p1 (k1,p1) 3 times, k3
Rep patt rows 1 to 4 eight times, so ending with a ws row.
Next Row: k12, take sts on holder behind sts on needle and k next st tog with first st on holder, so crossing the groups of sts, k sts from holder. 25 sts.
Next Row: k to end.
Next Row: k2, *p1, k1, rep from * to last st, k1
Next Row: k3, *p1, k1 rep from * to last 2 sts, k2.
Now rep the 4 patt rows 15 times.
Cast off.
Finishing:
Sew the cast-on and cast-off edges together.
It is a good idea to measure the band on your head before doing this so that you can sew it together to make it fit.
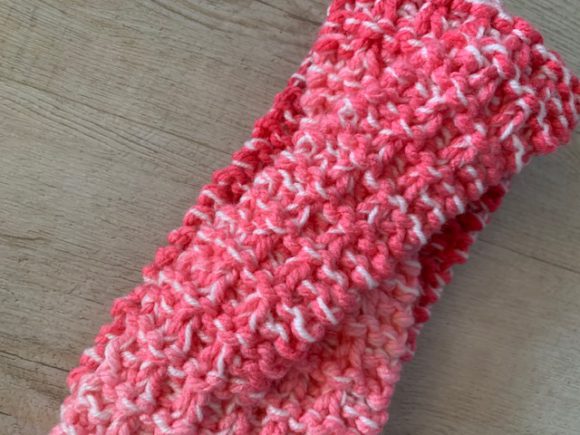
I found some bulky wool in my cupboard so I thought I would try this pattern. Instead of 25 stitches I cast on 13 and this was the result. It took me two hours to knit while I watched Heartland.

Knitted Headbands (Twenty to Make)


Monica Russel uses her fantastic design skills to create a wide range of gorgeous headbands in this book that can be purchase online and downloaded to your computer.
The huge variety in this book means that there is something that will appeal to everyone.
There are chunky designs to keep you warm in winter, and lighter headbands ideal for wearing in spring. These are quick and easy projects for all knitting abilities, which do not use huge amounts of yarn, and will great make gifts for family and friends that are both practical and attractive.

I would love to be able to knit a crossed headband like that. it is beautiful and easy to wear all the time.
I wish you made a video showing as practically how to do it. that’s what would have been much easier for us to see and really do what is necessary to get the best results.
But I will still try to follow your step by step directions and see what I will get.
Thank you
Good luck with the headband. It is very easy to make because all you need to know how to do is purl and plain knit and there are many tutorials online that will show you exactly how to do this.
Quite great to see here and I must say that I truly fancy this here. Thumbs up to you for sharing here. My daughters really love the headband and it seems like the best possible way to surprise them is to knit for them. Maybe on second thoughts, I should let them learn to do it for themselves.
Thanks
Since I don’t know anything about the crafts you have written about I can’t comment much about your content. Navigation on this website however is easy and the graphics look professional. I love your widget on each page “Shop for related products>” with your permission, I may “steal” that idea.
May God bless and keep you safe in these times.