My Memories Suite is my favorite digital scrapbooking software, and I have been using it for years now.
I have always been more of a hands-on type of scrapbooker, but every now and then I love to dabble in some digital scrapbooking.
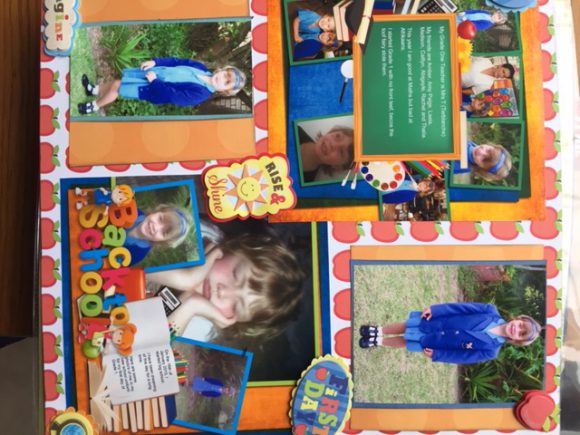
I also enjoy printing out my digital scrapbooking pages and then using them on one of my layouts, as I have done in the layout below.
 I was lucky enough to find My Memories Suite online, and after downloading this scrapbooking software and fiddling around for a few minutes with my six-year-old daughter, we put together an awesome page and managed to produce this simple but effective layout on the left.
I simply did the top left-hand square and the bottom right-hand square on the digital scrapbooking software and then printed them both out and added them to my layout. We both had a lot of fun putting this one together.
The software itself, although it looks daunting at first, is pretty easy to figure out. This digital scrapbooking software can be used on both Windows and Mac computers.
My Memories Suite is great if you want to create a customized album in minutes.
You simply open up the photos that you wish to place into your album and select the design layout and the fast-fill option. When you go in to work on your album, the photos are all there for you and all you need to do is add embellishments and journaling.
Every week they also send me freebie templates to download and use within the digital scrapbooking software.
Once you have completed your layout or album, the My Memories Suite allows you to save your work in several ways:
- You can print it for further use by yourself, as I did to use in my album.
- You can put it on a flash drive or save it in JPEG format and have it professionally printed.
- You can create an interactive album that can be shared online with friends and family.
- You can make it into a movie or DVD video.
- Hell, you even have the option to put it onto your iPod.
The suite comes with many different patterned papers, embellishments, ribbons and bows, and even different textures to experiment with. The fonts can be modified to your specs and the possibilities are endless. There are also numerous free downloads that you can use on the website.
Use this digital scrapbooking software to create personalized cards, calendars, and much more.
The only downside is that you need quite a bit of space (about 500mb) on your computer to download the software. It takes a while to set itself up, but once you have it done, it is well worth the wait.
STMMMS10034
The above coupon code will give you a $10 discount on your purchase of my favorite digital scrapbooking software – My Memories Suite. You will also get a $10 discount voucher for any other purchase you may wish to make on the site.
Visit: http://www.mymemories.com/digital_scrapbooking_software and start your digital scrapbooking experience now.
If you would like to read more about getting started with scrapbooking, click here.
Here are some digital scrapbooking ideas for those of you who want to try digital scrapbooking on your computer and don’t quite know where to begin.
 Easy Pages could be the perfect solution for your digital scrapbooking needs.
You can either make your pages as described below, or you can invest in a Scrapbooking Software Package. If you like this one, enter this code at checkout to get a huge discount – STMMMS10034.
How To Make An Easy Page
Easy Pages are pre-designed layouts that don’t require any advanced techniques. You can create an Easy Page by using your word processing program on your computer.
First, you need to prepare an Easy Page picture. Create a new page in Microsoft Word and set the size to the final desired print size.
Insert a graphics file as follows – Drawing toolbar – Insert text box – Fill Effects – Picture – Select Picture – Browse to file and insert.
In software such as Photoshop Elements, just open the Easy Pagefile. Use the save as option so that you don’t lose your original.
Next, you need to add photographs. Here you do exactly as you normally do in your scrapbooking by layering your elements on top of each other.
Adding your photos will create a second layer. In Microsoft Word, add a text box on top of your drawing space and insert your picture into it using the same path described above.
With your graphics software open the picture files that you wish to add to your layout, and then simply drag and drop your pictures on top of the Easy Page.
Adding your text is next, and you will need to add a new text bar for each unique text element, and then you will be able to move each one around separately.
Once you have created your first few easy page layouts and gotten the hang of it, you can use more advanced techniques. The great thing about these digital scrapbooking ideas is that you won’t have any scraps of paper to clean up afterward.
Another great idea that I use is to combine digital and conventional scrapbooking methods, by using scrapbooking embellishments such as brads or ribbons on my computer-generated layout to give a more 3D effect to the page.
You can see some more videos here on how to use this digital scrapbooking software.
