If you are into any sort of paper crafting such as scrapbooking then you have probably heard the term Paper Cutting used along the way.
Paper cutting is simply a technique that involves folding the paper and then cutting it into a single design with the sections still attached at the folds. Once the paper is unfolded, a design of repeated motives is revealed that is joined together at various points.
What Is Paper Cutting, And How Do I Get Started?
Part one explains exactly what is paper cutting, and will give you some invaluable tips on what materials you need to do paper cutting successfully as well as how to go about cutting for the best results.
In part 3 you can see how you can frame your masterpiece to show off your work in the best way possible.
Although I haven’t tried anything quite as intricate as what Grace Hart does above, I enjoy simple forms of paper cutting to use on my scrapbooking layouts.
Doing paper cutting takes me back to my childhood when we spent hours cutting out paper chains of people holding hands.
As you can see from the above video’s simple paper cutting has evolved and it has become a passionate art form for many crafters today.
What Do You Need To Start Paper Cutting?
How To Make A Trellis Using Paper Cutting For Your Scrapbooking
You will need a pair of sharp, pointed scissors, which will be used for cutting out all the finer details. Punching the holes in the trellis is optional, but you will need a punch tool for this.
You can also experiment by using scissors with blades that are designed to cut decorative edges, then your trellis could have scallops or even zigzag edging.
You can also use a craft knife if you prefer.src=”https://knittingforprofitreview.com/wp-content/uploads/2018/11/wood-3508067__340.jpg” alt=”what is paper cutting” width=”304″ height=”202″ />
-
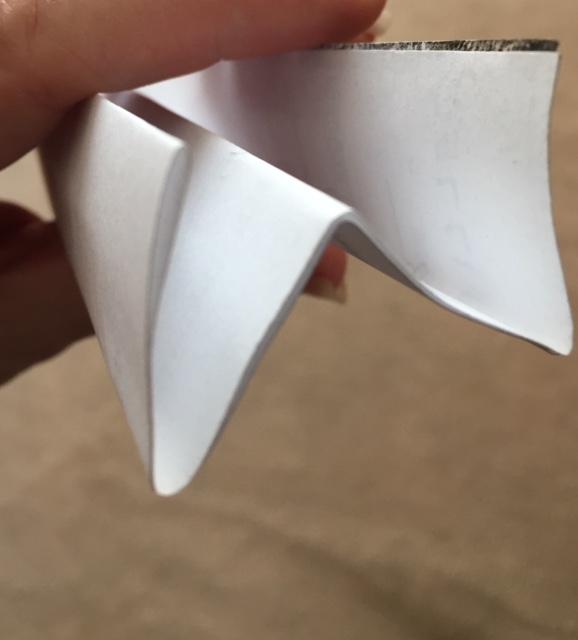
Fold a sheet of paper in half lengthwise so that the wrong sides of the design are together. This paper cutting technique works best with Strathmore 70lb drawing paper.
-
Fold the sheet in half again, aligning this fold with the two long edges.
-
Fold over the folded edge so it aligns with the fold made in Step 2.
-
Turn the paper over and fold over the two longer edges from step 1, so they align with the fold made in step 2.
-
The result should look like a double layer “M” shape, if you relax the folds.

-
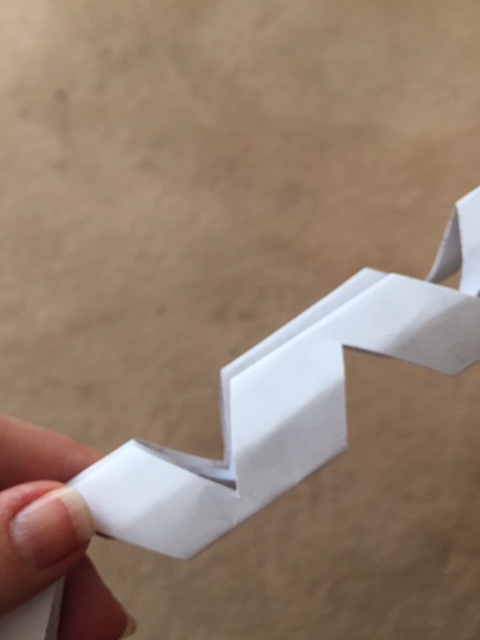
Using the grid on your cutting mat and a ruler, draw a zigzag along one side of the folded paper, spacing the points of the zigzag 6cm apart on each side.
-
Draw another zigzag parallel to the first and 1cm away from it. You can make the trellis thicker if you like.
-
Cut out the zigzag and be careful not to cut through the folded edges of the paper. Cut into the inside of each point from one direction, and then turn the paper around and cut into the point from the other direction. Make sure to cut the inside points neatly.

-
Open the cut-out paper along the central fold. Using the smallest punch of a leather punch or you punch tool, punch half a hole through the fold at each diamond point. Unfold the paper along the side folds and repeat the process until every point has a hole punched in it.
-
Unfold the paper carefully to reveal the trellis. Set an iron to warm and carefully press the paper flat.
Paper Panda’s Guide to Papercutting


In this gorgeous book, she leaves no doubt in the mind as to what is paper cutting and shows you not only how it’s done in easy-to-follow steps, but also provides over 20 papercutting templates to try out for yourself.
There are 20 papercut projects in the book; five from Paper Panda herself and five each from three of Paper Pandas friends and colleagues (Sarah Trumbauer, Louise Dyer and Suzy Taylor) all accomplished paper cutters in their own rights.


